12.07.2009

For The Cookie Plate: S'more Squares


As you're thinking about your holiday cookies, consider these adorable, little s'more squares. As a lover of all things little, baked goods especially, I couldn't keep myself from picking up a copy of Flo Braker's Sweet Miniatures: The Art of Making Bite-Size Desserts. Reading the introductory chapter, I did that thing where after every sentence I found myself saying, yes, yes, or that's me, that's totally me. She completely embraces the concept of making miniature desserts in the same way I do.

"Before you eat a miniature, you fall in love with it. After all, it's all yours. Who would ask you to share something so small and perfect?"

"The trim size of miniatures makes them desserts that are quite a bit less intimidating than a slice of cake or a scoop of ice cream." - Flo Braker


I definitely fall in love with my baked goods, and I always opt to make small desserts for parties and events because I know that people are more likely to try something if they can just have a taste and not have to commit to a whole big slice. For this reason, I cracked open Sweet Miniatures to look for ideas of what to make for a recent blogger event hosted by Public Radio Kitchen.

I thought these s'more squares would be perfect. There are very few pictures in the book, just a small chunk of glossy pages in the middle, but these bars happened to be pictured and grabbed my attention. (I had also made another recipe from the book for this event, but it was a complete flop, so I'll spare you the details until I figure out how to fix it.)

I spiced these s'more squares up a little by using cinnamon graham crackers instead of plain graham cracker crumbs. I love the cinnamon-chocolate combination.


S'more Squares (adapted from Sweet Miniatures by Flo Braker)
Makes 36 squares

Ingredients

Crust

1 1/2 cups (5 1/2 ounces) cinnamon graham crackers, crushed
1/4 cup packed light brown sugar
7 tablespoons unsalted butter, melted

Filling

2/3 cup all-purpose flour
1/4 teaspoon salt
1/8 teaspoon baking soda
2 ounces unsweetened chocolate, chopped
6 tablespoons unsalted butter
1 tablespoon water
1 cup granulated sugar
2 large eggs
2 teaspoons vanilla extract

Topping

2 ounces milk chocolate, melted
36 mini marshmallows

Preparation

Preheat oven to 325 degrees. Line a 9-inch square pan with aluminum foil.

To make the crust: In a large bowl combine crushed graham crackers with brown sugar. Add the melted butter, and mix well, making sure all the crumbs are moistened. Press the crumb mixture into bottom of the prepared pan. Set aside.

To make the filling: Sift the flour, salt, and baking soda into a small bowl. Set aside. In a microwave-safe bowl, melt the butter in microwave. Add chopped chocolate and stir until all chocolate is melted and mixture is smooth. Stir in the water. Transfer chocolate mixture to a large bowl, and let it cool slightly (about 5 minutes). Whisk in sugar, eggs, and vanilla, just until blended. Add flour mixture, and stir just until combined. Pour filling over crumb mixture in pan.

Bake for 30 minutes only. The cake may be slightly gooey and you may be tempted to leave it in, but do not overbake it. Cool completely on cooling rack. Then lift the cake out of the pan using the foil, and place it on a cutting board.

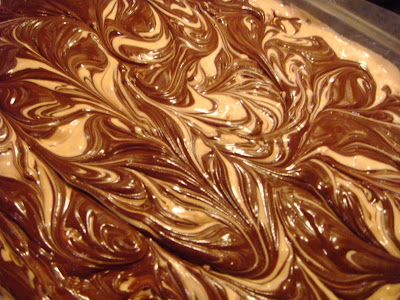
For the topping: Place melted chocolate in a sandwich bag, and cut a very small piece from one of the bottom corners to make a piping bag (or form a paper cone using parchment). Pipe zigzag lines over the surface of the cake.


Cut into small squares (6 by 6 worked best for me).


Center a mini marshmallow on each square.


Pipe a small dot of chocolate on each marshmallow.


I would let the chocolate harden before attempting to move the squares. The squares can be stored in plastic containers or wrapped in plastic and kept at room temperature for up to 2 days.

Besides that the marshmallows were not warm, gooey, and toasty, these really did taste a lot like s'mores.

I thought they were flavorful, had great texture, and could definitely satisfy a s'more craving when a campfire is just not an option. Those who tried them at the blogger event seemed to like them too.

For a detailed write-up of the event, which focused primarily on the local food scene in Massachusetts, check out A Fete for Food, which is written by Jess, one of the bloggers I had the pleasure of meeting at the event!

P.S. Do you know why they call them s'mores? Because you always want some more!

12.04.2009

Spiced Pumpkin, Lentil, And Goat Cheese Salad

spiced pumpkin, lentil, and goat cheese salad
I know what you're thinking... it's December now, so why is Megan still posting pumpkin recipes? November was a pretty busy month, and I didn't get all the posts up that I wanted to. But this salad was so delicious with such complex flavor that I couldn't not tell you about it. Maybe you can put it on the list for next year.

Or maybe you can still find a sugar pumpkin or a sugar pumpkin squash, which I discovered is a great substitute when you can't find a sugar pumpkin. Maybe acorn squash, which is still in season, could work instead.

Along with the pumpkin, this salad is rampant with lentils. The new Whole Foods in Dedham, Mass., has a great self-serve section for all kinds of nuts, grains, and such. I was able to easily find green lentils there and get the amount I wanted. I've never taken much advantage of this section before, but it's really useful. You even get to print your own label and stick it on the bag.

As I do with most salads, I prepared this one to bring for my lunch at work. I separated it into containers, layering the pumpkin and lentil mixture on top of the mixed greens, and adding dollops of goat cheese. I brought a little bit of red wine vinegar and oil in a separate container, and I also roasted the pumpkin/squash seeds, kept them on the side, and tossed those on top just before eating the salad for a little crunch and extra saltiness.

pumpkin seeds
Spiced Pumpkin, Lentil, and Goat Cheese Salad (adapted from Bon Appetit, October 2009)

Ingredients

6 cups 1-inch pieces peeled seeded sugar pumpkin or butternut squash (from about one 2-pound whole pumpkin) (I used a 2-pound sugar pumpkin squash but did not get 6 cups worth of pumpkin from it -- you can just adjust the spices accordingly for the amount of pumpkin you end up with.)
2 tablespoons olive oil, plus more for drizzling
1 teaspoon ground cumin
1 teaspoon hot smoked Spanish paprika
1/2 teaspoon sea salt
3/4 cup French green lentils
4 cups mixed greens
1 cup soft goat cheese, crumbled
1 tablespoon red wine vinegar (or as much as you like)

ingredients for spiced pumpkin, lentil, and goat cheese salad
Preparation

Preheat oven to 375°F.

Place pumpkin in large bowl; toss with 2 tablespoons oil, cumin, paprika, and sea salt.

spiced pumpkin
Arrange pumpkin in single layer on baking sheet; roast 20 minutes. Turn pumpkin over. Roast until tender, 10 to 15 minutes. Cool.

Place lentils in small bowl. Cover with cold water and soak 10 minutes; drain. Cook lentils in boiling salted water until tender but firm, about 30 minutes. Drain lentils. Rinse under cold water, and then drain.

lentils
Combine lentils, pumpkin, and oil from baking sheet.

pumpkin and lentils
Plate some mixed greens (or spread them in a container if preparing lunch). You can do a big plate or bowl if serving this for company or just set it up on individual plates. Top the mixed greens with the pumpkin and lentil mixture, dollops of goat cheese, vinegar, and oil. (Keep the vinegar and oil on the side if you don't plan to eat it right away. Then drizzle them on top just before eating.) Season with salt and pepper.

spiced pumpkin, lentil, and goat cheese salad
I was a little worried that the smoked paprika would be too strong, but when mixed with everything else, it imparts a more subtle flavor than you'd expect. (This was the first time I've cooked with it.) The components of this salad work really well together and can easily be adapted. As it is, the original recipe calls for arugula, but I opted for mixed greens instead because I had eaten an arugula-based salad the week before. I also brought late harvest Riesling vinegar to refresh the salad with one day instead of the red wine vinegar. The sweetness of it combined really well with the smoky earthiness of the rest of the components.

I definitely recommend giving this salad a try if you're a fan of pumpkin, lentils, and goat cheese. It's quite tasty, and it's got fiber and other good stuff too.

Do you bring lunch to work or do you buy your lunch instead? If you bring lunch, what sorts of things do you bring? Do you prepare meals ahead like I do? Or do you bring a sandwich or leftovers (like I do when I'm short on time)? I'm always looking for new ideas!

12.01.2009

Can You Believe It's Already December?

holiday baking supplies
Where has this year gone? I noticed how quickly the summer went by -- probably because it rained the entire time -- but somehow December slipped in, unannounced. I've barely finished baking pumpkin and apple goodies, and already visions of sugar plums have started dancing in my head. Well, maybe not sugar plums but definitely cranberries, gingerbread, candy canes, and cocoa.

I'm sure you're already thinking about your holiday baking too. I have magazines and cookbooks sprawled out in front of me at this very moment. I'm not going to give anything away just yet, but I have some exciting recipes in mind that I can't wait to share with you.

In the meantime, I thought I'd dredge up some of last year's posts. My family makes tons and tons (seriously thousands -- we've counted) of cookies and candies to give as gifts every Christmas. Over the years, I've found myself at the helm of candy-making. There are some candies and cookies we make each year -- like my fudge and the ever-popular almond brickle cookies -- and then there are always opportunities for new treats to make their debuts and perhaps secure spots on the next year's list.

Christmas 2007 cookie platter
If you're looking for some new favorites to add to your holiday baking or candy-making list, check out some of these candies! (Sorry, these pictures are from before I figured out how to take better blog pictures.)

Almond Brickle

almond brickle before chocolate is melted and spread
If you try no other recipes from this list, at least try this one. I'm often told by friends to make sure I put extra almond brickle on their cookie plates.

Chocolate-Fluted Kiss Cups

chocolate fluted kiss cups
These kiss cups are the most time-consuming and probably the most frustrating of all of the candies I make, but they are also so delicious they can make you forget all the work you put into them. And to save yourself a little trouble, if you make them in holiday mini cupcake wrappers, just leave the wrappers on. Then you won't run into any issues peeling the paper away from the chocolate shells.

Hazelnut Butter Balls

hazelnut butter balls
I've only made these hazelnut butter balls two years in a row now, so they're a newer addition, but they're as loved -- at least by me -- as some of the oldies.

Lindt Pistachio and Cranberry Bark


This simple bark is festively studded with cranberries and pistachios. It's the perfect salty-sweet treat!

Swirled Bark

swirled bark
Making this swirled bark is almost as easy as tossing store-bought chocolates on a platter, but with a few extra minutes, you can make your own candy to adorn your cookie plates.

Tiger Butter

tiger butter
Tiger butter is sure to become a favorite of anyone who loves chocolate and peanut butter.

What are your holiday baking traditions?

11.27.2009

Daring Bakers: Cannoli

cannoli
I think I got more excited about this challenge than any others I've done so far with the Daring Bakers! The macarons were frustrating and the puff pastry was fun, but cannoli are one of my favorite desserts, I don't have them very often, and I've never made them before. I couldn't wait to give it a try and see if mine could come anywhere close to ones from the wildly popular Mike's Pastry or Modern Pastry in Boston's North End.

To be honest, I never even thought about making my own cannoli. I've always envisioned making a cake with cannoli filling but never the actual shells. I just figured that making cannoli shells was something that only happened at Italian bakeries.

The November 2009 Daring Bakers Challenge was chosen and hosted by Lisa Michele of Parsley, Sage, Desserts and Line Drives. She chose the Italian Pastry, Cannolo (Cannoli is plural), using the cookbooks Lidia’s Italian-American Kitchen by Lidia Matticchio Bastianich and The Sopranos Family Cookbook by Allen Rucker; recipes by Michelle Scicolone, as ingredient/direction guides. She added her own modifications/changes, so the recipe is not 100% verbatim from either book.

I'm so glad Lisa Michele chose cannoli for this challenge. It pushed me to make something I might not have otherwise.

We were required to make the shells but could do whatever we wanted for the filling. I chose to make mini cannoli (how shocking that I might make something mini) filled with chocolate mousse, white chocolate cinnamon mousse, and regular cannoli filling.


I ordered mini cannoli forms and regular-size forms, but I never even opened the regular ones. The minis were just too adorable, and there wasn't so much dough that I felt overwhelmed by using it all to make minis, which I thought might happen. I'm sure I'll find a use for the regular-size forms eventually. I found four forms to be the perfect number: You can have two ready to go while you work with the other two in the oil.


There's nothing really tricky or unusual about making cannoli if you've worked with dough and you're comfortable with frying. To make sure they would work out okay, I fried one batch of dough one night and fried the rest the following night. The unfilled shells held up perfectly overnight. I stored them in a Ziploc bag with a paper towel to collect any remaining oil.

You can find the recipe below, or if you want a more complete version with total cooking time and necessary equipment, head to the Daring Kitchen.

Lidisiano's Cannoli Shells

Ingredients

2 cups all-purpose flour
2 tablespoons sugar
1 teaspoon unsweetened baking cocoa powder
1/2 teaspoon ground cinnamon
1/2 teaspoon salt
3 tablespoons vegetable oil
1 teaspoon white vinegar
Approximately 1/2 cup Riesling (or Marsala or other sweet red or white wine)
1 large egg white
Vegetable oil for frying

Preparation

In the bowl of an electric stand mixer or food processor, combine the flour, sugar, cocoa, cinnamon, and salt. Stir in the oil, vinegar, and enough of the wine to make a soft dough. Turn the dough out onto a lightly floured surface and knead until smooth and well blended, about 2 minutes. Shape the dough into a ball. Cover with plastic wrap and let rest in the fridge from 2 hours to overnight (I left mine for two days).

cannoli dough
Divide the dough into 4 equal pieces. Starting at the middle setting, run one of the pieces of dough through the rollers of a pasta machine.

running cannoli dough through pasta machine
Lightly dust the dough with flour as needed to keep it from sticking. Pass the dough through the machine repeatedly, until you reach the highest or second highest setting. The dough should be about 4 inches wide and thin enough to see your hand through.

rolled out cannoli dough
Continue rolling out the remaining dough. If you do not have enough cannoli tubes for all of the dough, lay the pieces of dough on sheets of plastic wrap and keep them covered until you are ready to use them. Cut out 1.5-inch circles. Roll the cut out circles into ovals.

cannoli circle
Oil the outside of the cannoli tubes for the first use. Roll a dough oval from the long side around each tube/form and dab a little egg white on the dough where the edges overlap. (Avoid getting egg white on the tube, or the pastry will stick to it.) Press well to seal. Set aside to let the egg white seal dry a little.

cannoli dough wrapped around cannoli tubes
In a deep heavy saucepan, pour enough oil to reach a depth of 1 to 1.5 inches. Heat until a small piece of the dough or bread cube placed in the oil sizzles and browns in 1 minute. Have ready a tray or sheet pan lined with paper towels or paper bags.

cannoli ready to be fried in oil
Carefully lower two of the cannoli tubes into the hot oil. Do not crowd the pan. Fry the shells until golden, about 2 minutes, turning them so that they brown evenly.

cannoli in oil
Using tongs, lift each cannoli tube out of the oil, making sure to drain the oil out of the tube back into the pan. Place the tube on paper towels or bags to drain. While they are still hot, grasp the tubes with a potholder and pull the cannoli shells off the tubes with a pair of tongs, or with your hand protected by an oven mitt or towel. Repeat with the remaining tubes. Let the shells cool completely on the paper towels. Place shells on cooling rack until ready to fill.

fried cannoli shells
Repeat making and frying the shells with the remaining dough. If you are reusing the cannoli tubes, toss them in the freezer for a couple minutes to cool between uses.

fried cannoli shells
Cannoli Filling

Ingredients

32 ounces ricotta cheese, drained
1 2/3 cups confectioners' sugar, sifted
1/2 teaspoon ground cinnamon
1 teaspoon pure vanilla extract
2 tablespoons grated orange zest

Preparation

Line a strainer with cheesecloth. Place the ricotta in the strainer over a bowl, and cover with plastic wrap and a towel. Weight it down with a heavy can, and let the ricotta drain in the refrigerator for several hours to overnight.

In a bowl with electric mixer, beat ricotta until smooth and creamy. Beat in confectioners' sugar, cinnamon, and vanilla, and blend until smooth. Transfer to another bowl, and stir in zest. Chill until firm. (The filling can be made up to 24 hours prior to filling the shells. Just cover and keep refrigerated.)


The chocolate mousse I used is from Cook's Illustrated, and the white chocolate cinnamon mousse is from Lindt Chocolate Passion.

When my friends came over, we started by dipping some of the cannoli in melted chocolate and then put them in the fridge to harden.

dipping cannoli shells in chocolate
chocolate-dipped cannoli shells
Then I supplied them with piping bags filled with the various fillings, chopped pistachios, chopped walnuts, and mini chocolate chips. We all went to town filling and decorating the mini cannoli.


cannoli
We had so much fun creating different combinations of fillings and toppings. And we had even more fun eating the mini cannoli, which were more delicious than I imagined possible. The shells came out with just the right amount of crunch, and for the first time I noticed the levels of flavor in the dough from the wine, cinnamon, and cocoa powder.

I would definitely make these again!

cannoli

11.26.2009

Caramel-Pecan Bars


In lieu of baking a pie for our mini Thanksgiving dinner for two (since I knew I'd be making a pie for our actual Thanksgiving dinner), I made these scrumptious, gooey caramel-pecan bars. I was intrigued by them right away because they're a recipe from Ken Oringer (or technically his mother-in-law) -- who is pretty well known here in Boston (I saw him on the bus once after work and had to refrain from getting all school-girl giddy). He has several acclaimed restaurants, including KO Prime, Clio, Uni, Coppa, and Toro -- where I have been dying to go for a while now (hint, hint).

I figured if the food at his restaurants is held in such high regard, these caramel-pecan bars must be pretty amazing too. Oringer did not let me down. (And only these bars were able to sway me from my plan to just use recipes from the November issues of my magazines.)

Besides the turkey, this dessert was the most time-consuming part of my preparation -- but it was mostly wait time. It's nice to have some recipes for the big day that don't require your constant attention.

Below is my half-recipe version. It makes 9 bars, so we have each eaten one every night since Sunday, and there's just one lone bar left. I'm hoping a brawl doesn't break out!

Caramel-Pecan Bars (adapted from Food & Wine, December 2009)

Ingredients

Crust
1 cup plus 2 tablespoons all-purpose flour
1/4 cup sugar
1/4 plus 1/8 teaspoon salt
6 tablespoons cold unsalted butter, chilled and cut into cubes
2 tablespoons ice water
1/2 tablespoon distilled white vinegar

Topping
6 tablespoons unsalted butter
1/2 cup plus 2 tablespoons light brown sugar
1/4 cup honey
1/4 teaspoon salt
1/2 cup heavy cream
7 ounces pecan halves

caramel-pecan bar ingredients
Directions

Make the crust: In a food processor, pulse the flour with the sugar and salt. Add the cubed butter and process until the mixture resembles coarse meal. Sprinkle on the ice water and vinegar and process until the crumbs are evenly moistened. Turn the crumbs out onto a sheet of wax paper and knead just until the dough comes together. Pat the dough into a disk, wrap in plastic and refrigerate until slightly chilled, about 15 minutes.

Preheat the oven to 375°. Line the bottom of an 8-by-8-inch metal baking pan with parchment paper (foil works fine if you're out of parchment). Roll out the dough between 2 sheets of wax paper to a 10-by-10-inch square (1/4-inch thick). Trim the dough to an 8-by-8-inch square and place it in the baking pan. Cut the remaining dough into 3/4-inch-wide strips and press them up the side of the pan to form a rim all around. Refrigerate the dough until firm, about 30 minutes.

unbaked crust
Line the dough with parchment paper and fill with pie weights or dried beans (or uncooked rice).

crust weighted with rice
Bake for about 20 minutes, until the dough is just set. Remove the parchment paper and weights and bake the crust for about 10 minutes longer, until lightly golden and set. Let cool.

golden baked crust

Make the topping: In a large saucepan, combine the butter, brown sugar, honey, and salt, and cook over moderate heat, stirring, until foamy and slightly thickened, about 10 minutes.

making caramel
Add the cream and cook, stirring occasionally, until a candy thermometer inserted in the caramel registers 240° (soft ball stage), about 10 minutes longer. (If you don't have a candy thermometer, I learned this great trick at the bakery where I work: Fill a glass with ice water, and drip a little bit of the caramel into the glass. Scoop out the caramel with your fingers, and roll it between your fingertips. If you can form it into a small, squishy ball, it's at soft ball stage. Following this trick actually enabled me to get caramel to work for the first time ever! I usually end up with rock-hard caramel.)

Add the pecans and cook for 2 minutes longer.

caramel and pecans
Pour the filling over the crust, spreading it evenly.

caramel and pecan filling in crust
Bake for about 15 minutes, until the crust is golden and the topping is bubbling.


Let cool completely. Slide the parchment onto a cutting board.


Cut into bars and serve.


Make Ahead
The bars can be stored in an airtight container at room temperature for up to 1 week.


My homemade whipped cream is apparently highly regarded in our home (I'm not sure why, as it's just whipping cream or heavy cream, confectioners' sugar, and vanilla), so I whipped up a batch to serve with these bars. They're probably best eaten if you just pick them up and bite into them. But we treated them like small squares of pie and ate them with a fork and sufficient dollops of whipped cream. I can't imagine having chosen a better dessert for the occasion. Somehow dessert ended up being my favorite part of the whole meal, and that's saying a lot considering how delicious the other recipes were!


I made my first double-crust apple pie for the official Thanksgiving dinner at my boyfriend's parents' house today (as opposed to my mini Thanksgiving). So I'll be sure to write all about that once the food coma wears off!

Did you make a dessert for today? What did you make?

Happy Thanksgiving to you and your families!