6.20.2010

Mini Chocolate-Covered-Strawberry Profiteroles

Mini chocolate-covered strawberry profiteroles

Last Saturday we went strawberry picking... in the rain. Now, having done it both ways, I will tell you, it is much more enjoyable to go on a hot July day when the sun beats on the strawberries, causing them to release all their fragrance into the air. Getting a little tan and soaking up some Vitamin D while gathering as many of the juicy fruits as you can into a cardboard basket is pleasant, even therapeutic. On the other hand, getting soaked through with a chilly rain and fearing putting the basket on the ground because the bottom might get soggy, fall out, and cause you to lose all those just-picked strawberries is not quite so pleasant. But I only have Saturdays off, and I wasn't about to let a little rain ruin my plans.


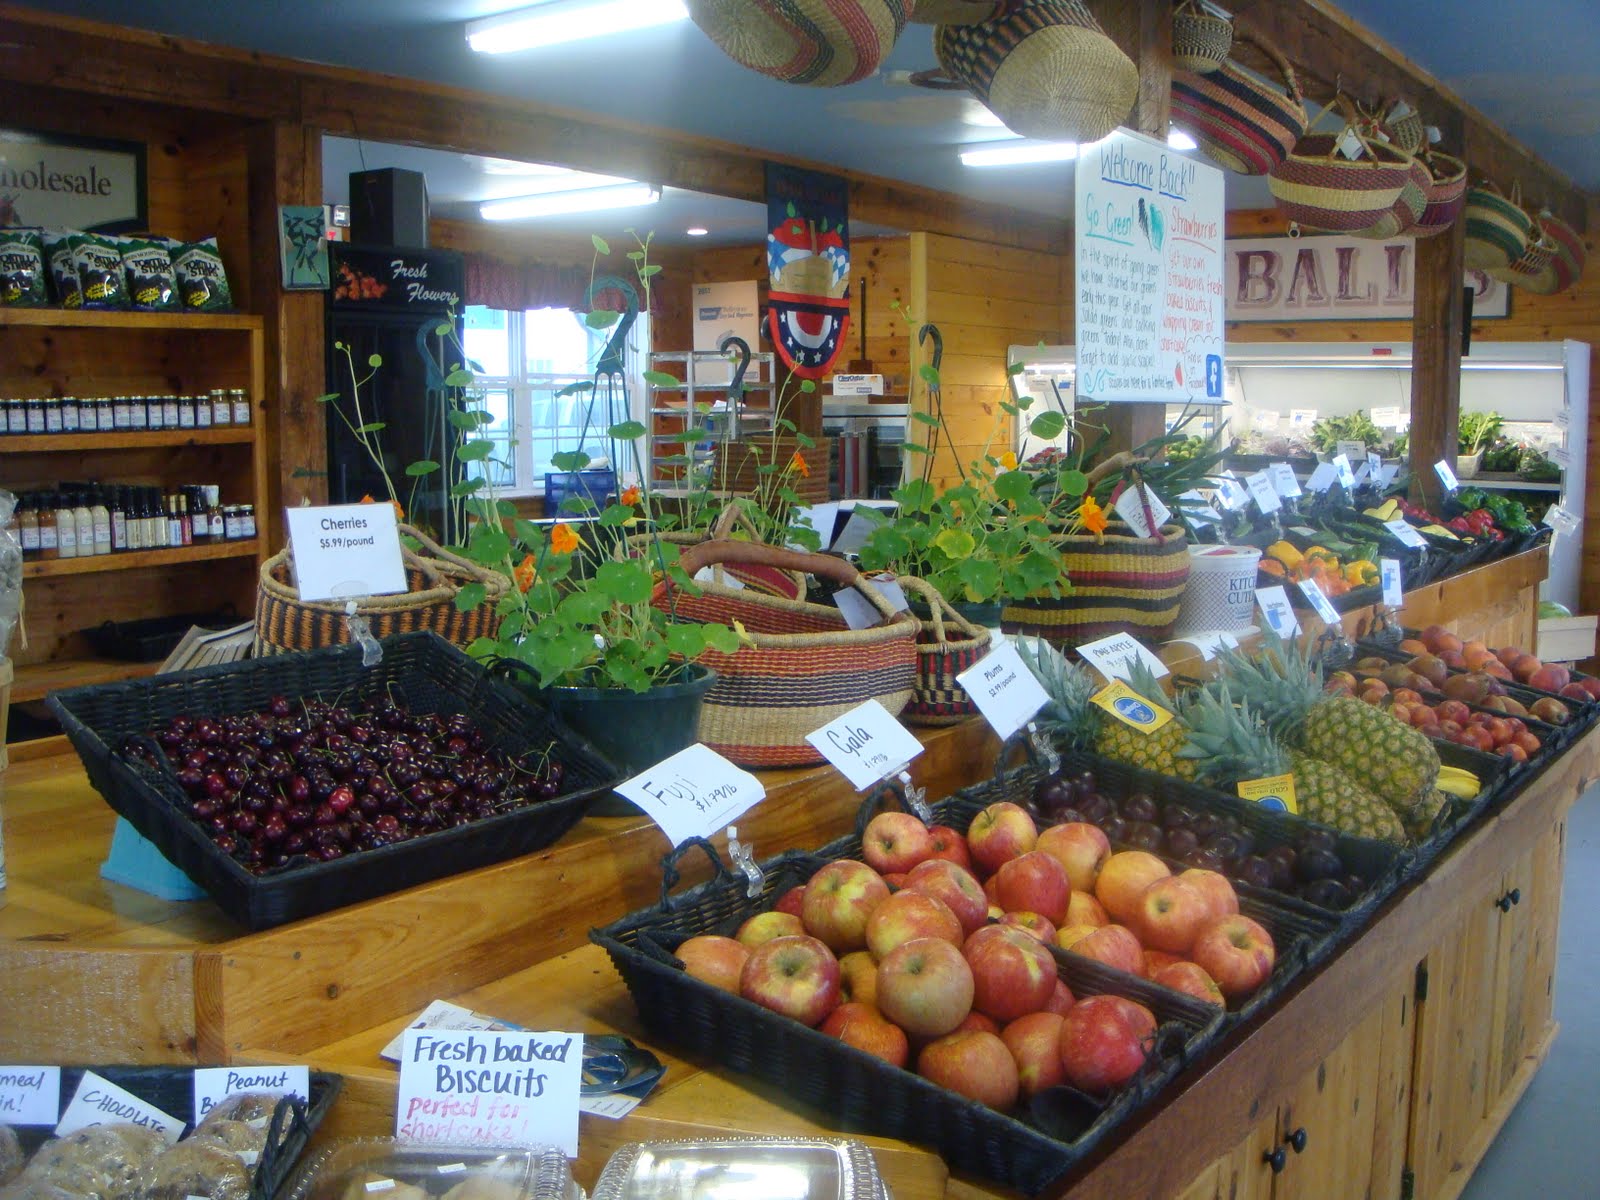
So Jeff and I took a leisurely drive to Kimball Fruit Farm up in Pepperell, Mass., early Saturday morning, thinking we might actually miss the rain. I googled a few different farms but went with Kimball because it has a stand at my local farmers' market in Union Square, and I'm always impressed with the wares. Of course, I could have just gotten some strawberries at the farmers' market that very morning instead of trekking to Pepperell and sloshing around in the strawberry patch, but there's no adventure in that!


We got off to a slow start. We were basically sent out back to the strawberry patch with no sense of direction whatsoever. In Connecticut, where I grew up, we would go strawberry picking, and it was all very organized. People would direct you to the rows that were ripe, ready for picking, and not already picked over. It was incredibly systematic, and I sort of expected that everywhere. To me it makes sense to keep track of what has been picked and what hasn't. But here, we were on our own, so we wandered aimlessly for a bit, checking here and there for that telltale red of a ripe strawberry. We finally settled into picking and surprisingly ended up with about 3 pounds of strawberries.


I picked up a few veggies before we left the farm, and then we decided to make a quick stop at Parlee Farms in Tyngsboro, Mass., to see whether we had chosen the better place to go picking.


We never made it far enough to check out the strawberry patch because as soon as we walked into the little farm store, the overwhelming scent of something fried and strawberry caught our attention. With a quick scan of the store, we found the source of that enticing smell: a donut maker!


We bought a little bag of hot, fresh mini strawberry doughnuts for the car ride home.

Back at home, I had a plan for those just-picked strawberries. A whole pound of them was to be used to make fresh strawberry ice cream. You may remember that I made strawberry ice cream a while ago. Well, I loved that recipe so much that I used the same one again. It's just heavy cream, strawberries, sugar, lemon juice, and salt. It could qualify for one of those new Haagen Dazs five flavors. And this time, Jeff made the ice cream because I was too busy preparing dinner, which included fresh tomato sauce from tomatoes we picked up at the farm.


I didn't want to just have a dish of strawberry ice cream though. I wanted to make something a bit fancier and something mini and came up with the idea to make profiteroles with strawberry ice cream. The March 2008 issue of Gourmet has always stuck in my head because of the picture of the profiteroles on the cover. So I dug that out for the profiterole recipe and accompanying chocolate sauce. Coincidentally, the ice cream recipe comes from the August 2009 issue of Gourmet. (I miss Gourmet, don't you?)

Mini chocolate-covered strawberry profiteroles

With the ice cream all made and firmed up, I cooked up some pate a choux (choux pastry, cream puff dough, whatever you want to call out) and piped profiteroles. Then I made the chocolate sauce, which intimidated me slightly because it requires melting sugar first. I've had many trials and tribulations with caramel over the years, and I think I'm finally getting the hang of it. The melting went smoothly, and the rest of the chocolate sauce was a cinch. (Note: My version below is just a half recipe. I wanted to cut the profiterole recipe in half too, but it doesn't divide as well. You could always make cream puffs with any extras!)

Mini chocolate-covered strawberry profiteroles

The diminutive profiteroles captured fresh strawberry flavor; light, airy pate a choux; and smooth, rich chocolate sauce all in one bite. They'd make a wonderful summer party dessert!

Mini chocolate-covered strawberry profiteroles

Mini Chocolate-Covered-Strawberry Profiteroles (adapted from Gourmet, March 2008 and August 2009)
(Print this recipe)

Ingredients

For The Profiteroles

3/4 stick unsalted butter, cut in small chunks
3/4 cup water
1/4 teaspoon salt
3/4 cup flour
3 large eggs

For The Chocolate Sauce

1/4 cup sugar
1/2 cup heavy cream
Salt
3.5 ounces good quality bittersweet chocolate, finely chopped (I used Callebaut and Ghirardelli)
1/4 teaspoon vanilla extract

Strawberry ice cream (homemade or store-bought)

Preparation

Profiteroles

Preheat oven to 425 degrees. Line two cookie sheets with Silpats (or butter the cookies sheets).

Bring butter, water, and salt to a boil in a small saucepan, stirring until butter is melted. Reduce heat to medium, and stir in all of the flour. I like to use a wooden spoon for this. Continue stirring until mixture forms a ball and pulls away from the sides of the pan, about 30 seconds.

Transfer mixture to bowl of electric mixer, and let cool for 2 to 3 minutes.

Using electric mixer fitted with paddle attachment, beat the eggs into the dough one at a time.

Transfer mixture to a piping bag fitted with a small round tip. Pipe mounds of dough about 3/4 inch in diameter onto a cookie sheet 1 inch apart. Pat down any peaks with your fingertip.


Bake sheets one at a time until mounds are puffed and golden, 15 to 20 minutes. Remove puffs from oven and poke each one with a toothpick. Return them to the oven for 3 minutes with the door propped open to dry them out. Let cool on rack. (Repeat with next pan.)


Chocolate Sauce

Melt sugar in small, heavy saucepan over medium heat, stirring occasionally and swirling pan to make sure it melts evenly. When the sugar reaches a dark amber color, remove the pan from the heat.


Carefully stir in the cream and a pinch of salt. Return to heat, and continue stirring until caramel dissolves.


Remove from heat, and whisk in chocolate and vanilla. Cover, and keep warm.

Assembly

Make sure your profiteroles are completely cool, and remove your ice cream from the freezer, allowing it to soften enough to scoop it.

Place three or four profiteroles on a dessert plate. Cut them in half horizontally.


And then, using a small scoop, place a scoop of ice cream on each profiterole base. Replace the tops. Drizzle with chocolate, and serve. Repeat for as many servings as you need, or until you run out of profiteroles.

Mini chocolate-covered strawberry profiteroles

Any leftover chocolate sauce and ice cream pair up very well for ice cream sundaes!


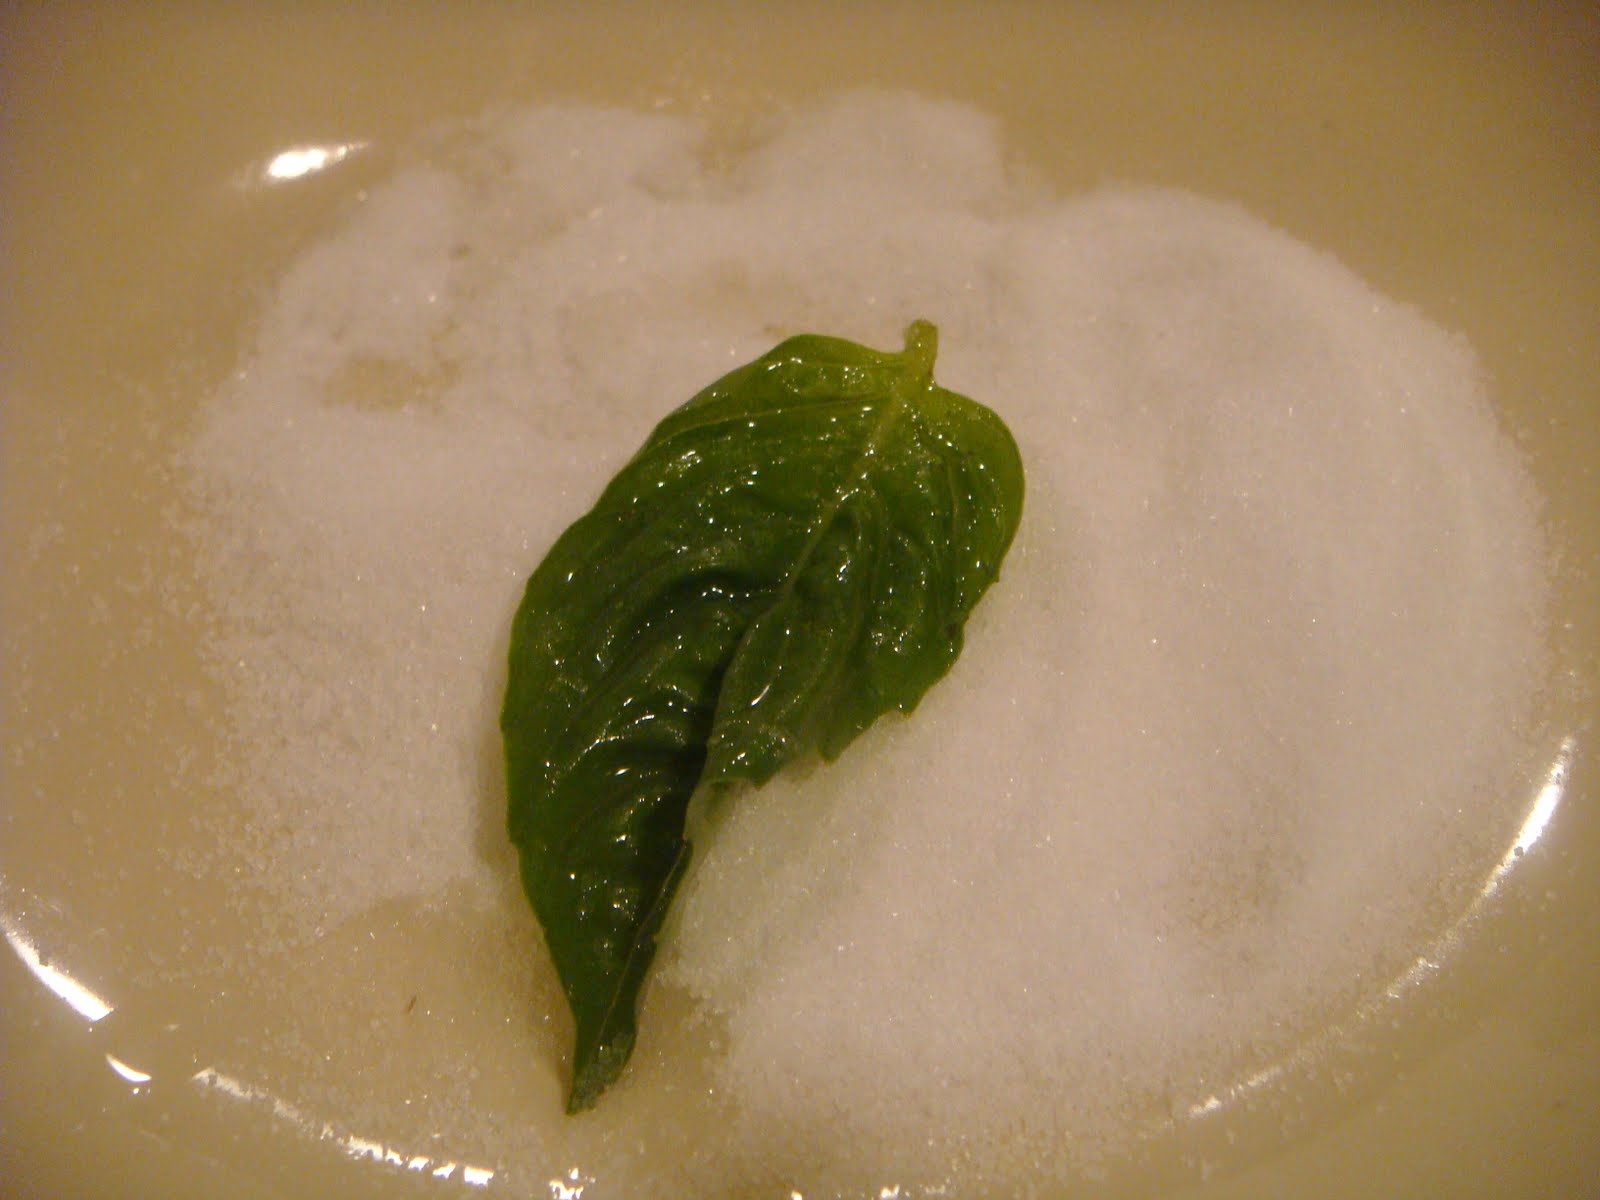
Have you been picking or buying strawberries? What are you making with them? For another idea check out my Mini Strawberry Shortcake Sammies With Sugared Basil Leaves. They're so simple. I actually made them again this weekend for my sister's high school graduation party.

And... Happy Father's Day to all the dads out there! Since my sister's graduation party happens to be today, I'm lucky to be home in CT spending the day with my dad... and the rest of my family.

6.19.2010

Farmers' Market Finds, June 19


This morning we woke up without the assistance -- or annoyance -- of any alarms. It was nice to just wake up when I was ready to wake up instead of when I had to be up. We put a very excited chocolate Lab on his leash and made the sluggish walk to Central Square for some Starbucks. One grande caramel machiatto (for Jeff) and one iced grande soy cinnamon dolce latte (for me) later, we were much more awake and energized -- and able to keep up with the eager puppy. Well-caffeinated, we walked back toward Inman Square, where we live, and into Union Square to check out the Saturday morning farmers' market.

It's becoming a habit for me to stop at Iggy's and get a cranberry pecan roll for my breakfast. I'm pretty much obsessed with them. After that I wander around to the different stands and decide what I want to buy that week. I found a bunch of great produce today that I plan to use in some upcoming recipes.

Strawberries
Strawberries

Basil

Mint

Golden beets

Chioggia beets!
I'm so excited for these. I've never found them anywhere before.

What would you make with these farmers' market finds? What have you picked up lately at your farmers' market?

Happy Saturday!

(I have to give Jeff credit for all these great photos! He's the better photographer, and he has the better camera.)

6.10.2010

Mini Strawberry Shortcake Sammies With Sugared Basil Leaves


Have you ever had a sugared basil leaf? It's a revelation -- seriously. I tried one for the first time last week when Jeff and I had dinner and dessert at Bergamot, a new-ish restaurant in Somerville, Mass. (in the former EVOO spot). It came with a strawberry dessert, and in the candlelit restaurant, I wasn't quite sure what it was, but I broke a little piece off, tasted it slowly, and was incredibly surprised when I realized it was basil with a sugary crust. You get that bright, fresh flavor basil is loved for, plus a teeny bit of sweetness, and an amazing crispness. I knew that as soon as I got my hands on some basil, I was going to try to recreate my new favorite garnish.

Well, wouldn't you know, we went out to dinner on Friday night, and the Union Square Farmers' Market started up on Saturday morning. We went to the market first thing because we were heading to Connecticut that morning to visit our friends and their new baby. I did a brief scan of all the offerings and ended up at the Kimball Fruit Farm stand, gathering up bunches of basil and a pint of juicy strawberries. I thought I would make strawberry shortcakes and top them with my version of a sugared basil leaf.

We actually ended up having strawberry shortcakes with our friends in Connecticut, made with some freshly picked strawberries, so I didn't make these shortcake sammies until Sunday night -- even though I probably could have eaten more strawberry shortcakes on Saturday evening.

Something about farm fresh berries -- I can't get enough of them. I think if you put a just-picked strawberry next to one from the supermarket, you've almost got two different fruits there. A just-picked or farmstand strawberry is a vibrant red, has a strong fragrance, and is so soft and juicy when you bite into it. A supermarket strawberry has a much firmer texture and less juiciness to it. During the summer, I definitely recommend taking advantage of any picking or farmers' market opportunities for getting strawberries.


With strawberries and basil at the ready, I began flipping through my cookbooks to find a good shortcake recipe. I don't like anything too cakey or too biscuit-y, so I'm kind of hard to please when it comes to shortcake. I usually make a Martha Stewart recipe, but it's still a little more on the biscuit side than I would like.

I opted for a recipe I found in Baking Illustrated and of course made a couple of small modifications. I really loved the way these came out. The were biscuit-like but also very light, moist, and mildly sweet.

Before I started the shortcakes, I cleaned and hulled all of my strawberries. Somewhat following the Baking Illustrated instructions, I placed half of the berries in a bowl and sprinkled some sugar over them. I sliced the remaining berries, stirred those in, and left all of the berries to macerate. I was using ripe, red berries and I didn't think they needed to be overwhelmed with sugar, so I didn't use nearly as much as the recipe called for.

Once I had my shortcakes in the oven, I worked on the basil leaves. While they didn't come out quite as crisp and brittle as the one I had at Bergamot, I still liked my version. (Since then, I've gotten some tips on how the pastry chef at Bergamot makes hers, and I'm going to give it another try soon. If I achieve the perfect results, I'll be sure to share them with you.)

Mini strawberry shortcake sammies

Mini Strawberry Shortcake Sammies With Sugared Basil Leaves (adapted from Baking Illustrated; inspired by Bergamot)
Makes 4 mini sammies (enough for dessert for two) with leftover shortcake dough for future desserts
(Print this recipe)

Berries

Ingredients

1 1/2 cups strawberries
1 tablespoon sugar

Preparation

Clean and hull berries. Place half of berries in a bowl and sprinkle with sugar. Gently mass them with a fork or potato masher. Slice the remaining strawberries and toss the slices in the bowl with the mashed berries. Set aside.


Mini Shortcakes

Ingredients

2 cups all-purpose flour
3 tablespoons sugar
1 tablespoon baking powder
1/2 teaspoon salt
8 tablespoons cold, unsalted butter, cut in cubes
1 egg, lightly beaten
1/2 cup plus 1 tablespoon half-and-half
1 egg white, lightly beaten
Turbinado-style vanilla sugar

Preparation

Preheat oven to 425 degrees.

Pulse flour, sugar, baking powder, and salt in food processor to mix. Add butter pieces, and process until butter is evenly dispersed throughout flour mixture and mixture resembles coarse meal. Transfer to a medium bowl.

In a measuring cup, mix the beaten egg with the half-and-half. Add the egg mixture to the flour mixture, and stir together with a rubber spatula, until dough starts to come together.

Lightly flour your countertop, and turn the dough out onto it. Knead until the dough comes together, being careful not to work it too much.

Pat the dough into a 9- by 6-inch rectangle. Using a 1 1/2- or 2-inch biscuit cutter, cut out 4 circles of dough. Place the circles on a cookie sheet.

Brush the circles with some of the beaten egg white, and sprinkle turbinado sugar on top.


Bake the shortcakes for about 10 to 12 minutes, until golden brown. Place cookie sheet on a wire rack to cool.


While the shortcakes are baking, cut circles from the remaining dough, reforming the scraps to get more circles. Place these on another cookie sheet, and pop them in the freezer. Once they have hardened, you can place them in a bag, and now you'll have little shortcakes you can pull out of the freezer and bake whenever you have fresh strawberries on hand. Just remember to brush them with egg white and sprinkle them with sugar, and either let them thaw out first overnight or adjust your baking time and temp accordingly.

Sugared Basil Leaves

(Click here for newer, crunchier version)

Ingredients

1 cup water
2 cups sugar
basil leaves

Preparation

Heat water and 1 cup of the sugar in small saucepan until sugar is dissolved. Set the simple syrup aside to cool slightly.

Place remaining sugar in a shallow bowl.

Drag basil leaves, one at a time, through the simple syrup and then coat them with sugar (as if you are dredging chicken).


Place on rack to dry. (I recommend making only as many as you want that night as they don't hold up well.)


Whipped Cream

Use your favorite homemade recipe or store-bought version.

Assembling The Sammies

Take out two dessert plates, and set two shortcakes on each plate.


Carefully split the shortcakes just by pulling them apart with your fingers. They will naturally split.


Top each shortcake base with some of the berries, adding extra juice if desired.


Add some of the sugared basil leaves, and a dollop of whipped cream.


Replace the shortcake tops. Serve with extra whipped cream, berries, and basil, if desired.

Mini strawberry shortcake sammies

I set out forks with these, but I found it was much more fun to pick them up and bit into them like little dessert sandwiches, so I ended up calling them shortcake sammies instead of just shortcakes.
I really loved this dessert, and I hope you will too.

Oh, and don't think I let all my leftover basil go to waste...


...there's plenty of pesto in my freezer now!


What's your favorite thing to make with summer strawberries?

What do you tend to seek out at the farmers' market?

6.06.2010

Easy, Mayo-Free Pasta Salad

Mayo-free pasta salad

I don't know about where you live, but here it's hot... and muggy. And sometimes it's best not to turn on the oven at all. The pasta salad I made for dinner the other night only requires turning on the stove long enough to boil some pasta and steam some broccoli. Crafting the pasta salad is as simple as chopping some veggies and cheese. And all of the ingredients get tossed together in one bowl, so cleanup is easy too.

Admittedly, this pasta salad idea came from seeing a box of Suddenly Salad, which I would normally buy to make a quick meal. This time I decided I wasn't going to cave in to the simplicity and convenience of a boxed pasta salad but rather make my own, which turned out to be very simple too. And I didn't even have to skim dehydrated vegetables off the top of the boiling pasta water, like I do with the Classic Suddenly Salad.

I made sure this pasta salad was chock-full of veggies and flavor, and I loved that it wasn't weighed down with mayo, like so many pasta salads. I'm not a big fan of mayo. I used Italian dressing this time, but I think I may even try making my own dressing next time too.

I highly recommend the grape tomatoes, but I had to add them just to my plate because a certain person I share my meals with does not like tomatoes. Can you imagine? I don't know what I'd do without tomatoes.

Mayo-free pasta salad

Easy, Mayo-Free Pasta Salad
(Makes enough for a crowd, dinner for a few nights, or dinner and a couple of lunches)
(Print this recipe)


In large bowl, toss together:

1 pound rotini, prepared according to package and then rinsed with cold water
1 5 oz. package Hormel Pepperoni Minis
1 to 2 cups broccoli florets, steamed, plunged in an ice bath, and drained
1 yellow pepper, diced
1 orange pepper, diced
1 English cucumber, peeled (optional) and diced
4 ounces Monterey Jack cheese, cubed
1/2 cup Italian dressing
Handful grape tomatoes, halved (optional)


Serve.


What are your favorite things to throw in pasta salad?

6.03.2010

Philly Cheese Steak Sandwiches


Last week, Jeff and I finally had time to eat a homecooked meal together again. And I made Philly cheese steak sandwiches because I had steak and cheese on the brain! We also had our first ears of corn of the season! I don't know about you, but when I get a craving, it usually lingers until I satisfy it. I can eat a million other things, but if I don't have just what I'm craving, I keep on craving it. This time it was cheese steaks.

Let me tell you how this craving started... several years ago, my mom and I took a trip to Philly, and I fell completely in love with the city.


I loved the buildings. We went to a couple of open houses just to see how cool those row houses look inside.


I even checked the price of rent at some dockside apartments ($3,000 a month for a studio!).


I wanted to move to Philly. I loved the atmosphere. And, oh, boy, did I love the food! I think we spent hours wandering around the Reading Terminal Market, tasting a bit of this and a bit of that, and really swooning over the pork dumplings.


We chowed down on our very first cheese steak sandwiches at Jim's on South Street, and I had my first taste of scrapple at the South Street Diner. Scrapple is delicious -- just don't think about it.


We've gone back a couple of times since then, bringing along various family members. One time, I believe it was when I was there with my mom, dad, my dad's mom, and my two youngest siblings, we decided to do a "steak off" (not to be confused with a stake out). (I honestly have all the visits a little jumbled together because they were so long ago, and I don't think I had a digital camera for that first visit. These pictures are from two later visits. If I'm wrong about who was there, I know my other sister will set me straight!)

We stopped at Jim's, Pat's, and Geno's all in one night to sample the cheese steak sandwich offerings and choose our favorites. It may shock you to hear that we didn't choose the ever popular, well-known Pat's or Geno's, but we all agreed Jim's was the best.


I love walking in and watching them chop the meat right on the grill, sauteeing the veggie options alongside. A true Philly native would go with a Whiz wit (Cheez Whiz and onions), which I tried on one visit, but I prefer provolone, peppers, onions, and tomatoes on mine.


But that was all a long time ago, so why the sudden craving? Well, my mom and my youngest sister have been making frequent trips to Philly lately (my sister has been visiting colleges and also went down to run the UPenn relays) and sending me text messages about being at Jim's and having cheese steaks. Aren't they sweet?

I began to really miss Jim's and good cheese steaks, so I decided I would attempt to make my own. These aren't too shabby for the homemade variety, and they've managed to subdue that constant craving I was walking around with, but I know I still need to get down to Jim's again at some point. I don't think I've been there in three years now.

I tried a recipe from the Food Network, specifically from Emeril, which I really liked but had to make some changes to. You'll be happy I tested this one out because there were missing ingredients and incorrect instructions. It should work perfectly for you now!

Philly Cheese Steak Sandwiches (adapted from the Food Network)
Serves 2 very hungry people
(Print this recipe)

Ingredients

2 fresh rolls of your choice, split in half crosswise, and toasted if desired
1 tablespoon olive oil
1 onion, thinly sliced
1/2 large green bell pepper, thinly sliced
1 teaspoon minced garlic
1/2 teaspoon salt
1/4 teaspoon ground black pepper
1/2 pound rib-eye steak, very very thinly shaved or sliced (it's easiest to thinly slice it if you freeze it first)
6 slices white American cheese (or any kind of cheese you like)
One small tomato, diced (if desired)

Directions

Preheat oven to 400 degrees.

Heat a cast-iron skillet or griddle over medium-high heat. Add the oil, onions, and peppers, and cook, stirring occasionally, until caramelized or just softened, depending how you like your veggies. Stir in the garlic and salt and pepper, and saute for 30 seconds. Push veggies off to one side of the pan or transfer to a plate.


Add the meat to the hot pan and cook, stirring and breaking up with the back of 2 metal spatulas (this made me very nervous because I was afraid of ruining the surface of my pan, so the meat was not as broken up as it would be at a real cheese steak place), until almost no longer pink, about 2 minutes. Mix in the sauteed vegetables.


Spoon the meat mixture into the rolls, top with tomatoes, if desired, and cheese, and place in the oven for 2 minutes, or until cheese is melted.


Chow down!


Where do you find your perfect cheese steak sandwich? And what's on it?