7.31.2009

Ladybug Cupcakes (And Some News)


It didn't take long before I was swooning over the pages of Martha Stewart's Cupcakes and walking out of Barnes & Noble with a copy. It also didn't take long for me to read the entire book cover to cover and realize how many of those mini cakes I wanted to make. I started simple, with a quarter batch of streusel cupcakes -- a quarter batch because I only had enough sour cream in the fridge to make that many and I was only baking for two. They were pretty good but a little dry (which could be my error and not the recipe's), and really I can't say I'm much of a fan of cupcakes without frosting. But if you think of them as small coffee cakes, they're perfect.


And as I am pretty much insatiable when it comes to baking and cooking, soon after that I asked my boyfriend to select the next cupcake. He remembered seeing one with ladybugs in grass when I originally flipped through the book and started holding up every other page for him to look at and asked if we could make those. They looked really fun, so I accepted the challenge.

After a trip to Kitchen Arts on Newbury Street for a set of decorating tips and some gel-paste food coloring and to the grocery store for any ingredients missing from my pantry and fridge (cake flour, buttermilk, etc.), I had all the necessary supplies.

Martha recommends using her yellow buttermilk cupcake recipe for these cupcakes, so I did. There's really nothing special about the batter except that I've never used buttermilk in cupcakes before. The recipe produces a basic yellow cupcake, which is probably best for an elaborate frosting and little ladybugs.


But after the cupcakes were baked and cooling, my boyfriend brought up a very valid point that I can't believe Martha missed. He wondered why we hadn't done chocolate cupcakes, as the chocolate would better represent soil under the grass. If I ever make these again, I'm switching to chocolate cupcakes.

Baking the cupcakes is really not that difficult; it's the decorating that can be tricky. And piping grass and making tiny ladybugs is not as easy as it seems (if it seems easy to you; I had no false hope there).

We had to start by kneading food coloring into marzipan. We split the marzipan in half, and I turned my half red and my boyfriend turned his black. The red would form the ladybug bodies and the black was to be used for their heads and spots. Kneading the food coloring in was probably the most difficult thing, and I'm sure we looked ridiculous because I didn't think to get gloves, so I outfitted us with Ziploc sandwich bags instead. I think it was better than staining our hands red and black. (I almost made a joke about being caught red-handed but refrained for your sakes.)


So we took the red and started forming little bodies and then took the black and formed little heads. I think Martha recommended 1/2-inch balls for the bodies and 1/4-inch balls for the heads, but we thought these seemed too big and made our bugs even smaller.

Once we had the heads and bodies attached, which is as simple as pressing the two pieces together, we started adding the little spots.


To make the spots, we had to pinch off teeny pieces of the dyed-black marzipan and roll them into little balls. And then we just stuck the spots on the little red bodies as we saw fit.


You all know how much I love mini things, so crafting the little bugs was incredibly fun. He doesn't think so, but I thought my boyfriend was even better at forming them than I was, so eventually we split up responsibilities and he finished the ladybugs while I made the frosting.


The frosting was a Swiss meringue buttercream. I've made regular buttercream many times before, but this was nothing like it. I first had to place the bowl from my Kitchen Aid over a pot of simmering water on the stove (like a double boiler) and whisk up egg whites, sugar, and salt in it. Once the sugar dissolved, I placed the Kitchen Aid bowl on its stand and whisked for about 10 minutes more. And then, don't cringe, I incorporated 4 sticks of butter a few tablespoons at a time! And then added a little bit of vanilla.


Martha describes this frosting as having a stable texture, which it needs when you use it to make blades of grass. We really didn't think it was stable enough. Some of my grass looked like a strong wind had come through. Oh, and it took me about a hundred drops of green food coloring to get the frosting anywhere close to a green dark enough to resemble grass rather than mints. But it worked well enough, and though it's not as sweet as regular buttercream, the frosting had good flavor.

Piping takes a lot of patience. I used a multi-opening tip and started at the center of each cupcake.


Martha instructs to squeeze the piping bag and then release while pulling up. It sounds pretty simple, but the frosting was not always cooperative. I was pretty happy with the results considering this is the first time I've really tried to do anything this elaborate.


As I finished piping grass onto each cupcake, my boyfriend would place a ladybug or two in the newly created fields. They looked adorable.


These cupcakes took a lot of time and effort, but the end result is incredibly cute cupcakes that would be the perfect thing to bring to a summer gathering or picnic.


And now for my news: I've just started a part-time position as a baker! I am very excited. It's been my dream as of late to get myself into the baking world. I'm so happy to have been given this opportunity, and I'm working with great people who are so knowledgeable about the skills and methods that I'm looking to learn. Right now I do a lot of cookie baking and muffin scooping, but I'm looking forward to the opportunities ahead.

The downside is that now that I'm working two jobs, I will have a lot less time for blogging. I'm hoping to still do two posts per week though, so please stick with me. And I fear that with all the baking I'm doing at work, I may end up doing less baking at home (shh... don't tell my boyfriend I said that). But I'm sure I'll still have plenty of dinners to share with you, and I doubt I will really cut out baking at home for too long anyways.


Have you made any cupcakes from Martha's new cookbook? Or have you made any elaborate marzipan or fondant creations?

7.29.2009

Penne With Chicken And Pesto


After years of buying little tubs of pesto at the store or the farmers' market, I finally stepped up and made my own. I knew it was simply a matter of tossing some ingredients in the food processor, but I don't know why it took me so long to try it.


Last week I went to the farmers' market in Central Square and selected a lush, aromatic bundle of basil -- perfect for pesto making. I already knew I had the rest of the ingredients at home because I pretty much always have olive oil, Parmesan cheese, and garlic. I'm not so likely to have pine nuts, but I happened to have some leftover from another recipe (which I had thrown in the freezer to keep fresh).

Even though pesto is indescribably delicious, I can't imagine just dipping a spoon into it and eating it, so I planned a recipe around it. This simple recipe consists of three basic ingredients: pesto, chicken, and penne. It's easy to make too. Just make sure you read the whole thing through before starting in case you want to time it out like I did so everything is generally ready at the same time. Besides, it's always good practice to read a recipe in it's entirety before preparing it.

Penne with Chicken and Pesto

What you'll need:

2 chicken breasts
1 lb box penne (You could use another shape, but I liked the way the penne went with the chicken.)
salt

Pesto (ingredients to make your own below -- based on Giada de Laurentiis' recipe)
2 cups (packed) fresh basil leaves
1/4 cup toasted pine nuts
1 garlic clove, peeled (I put mine through my garlic press because it's easier than peeling it.)
1/2 teaspoon salt
1/4 teaspoon pepper
1/2 cup olive oil (roughly)
1/2 cup grated Parmesan cheese (I used Kraft because I had it, but I think freshly grated would have improved the flavor of the pesto.)

First, place the chicken breasts in a large pan and fill the pan with water until the chicken is covered. Lightly salt the water and bring it to a boil over high heat. Then cover and reduce to a simmer. Continue simmering for 5 minutes. Turn off heat and let stand 12 to 14 minutes, until chicken is cooked through. Then remove chicken from the water and set aside on a plate.

While chicken is cooking, prepare the pesto. Pulse basil, pine nuts, garlic, salt, and pepper in food processor until finely chopped. Gradually add in olive oil just until mixture is smooth and thick. Place pesto in a large bowl (one big enough to fit the chicken and penne), and stir in the cheese. Season more if necessary. Set aside.

Cook pasta according to directions. Then drain and toss with a splash of olive oil.

With the pesto resting and the chicken cooked, while the pasta water is boiling (or once your pasta is done, whatever works better for you), shred the chicken. Cut chicken into large chunks and use two forks to pull the meat apart.

Then stir some chicken and some penne into the pesto mixture. Continue to gradually add more chicken and penne to the pesto until the pesto to chicken/penne ratio is right for you. I used all of the chicken and most of the pasta. You can drizzle in a little more olive oil to moisten the mixture and enable you to stir it more easily if you want.

Then serve!


I threw some diced Campari tomatoes on top of my pasta. I absolutely love tomatoes, and look for any excuse to eat them. They go great with pasta, pesto, and chicken -- so for me, they really brought the whole dish together.


But boyfriend had his as is, and really enjoyed it. Either way, it's incredibly tasty.


Best way to reheat the leftovers: Throw them in a pan over medium-high to high heat, add a little more Parmesan cheese, and saute until the pasta and chicken start to brown and get a little crispy. (If your pasta is a little dry, just add more olive oil when you reheat.) I promise you it's amazing.

7.23.2009

Homemade Granola Bars


I've made granola a couple of times now -- the Henrietta's Table recipe I told you about that I am so fond of and Francois Payard's chocolate granola, which I didn't write about here, but I must tell you that I ate it for breakfast every day for a week with sliced bananas and vanilla yogurt, and I savored each and every bite.

I really like making my own granola, and both times I've made it I thought it was much better than any granola I could find in a store. So a couple of nights ago, I thought why not try making my own granola bars too.

Armed with my new Barefoot Contessa cookbook (she's a recent obsession), I headed to the kitchen. The nice thing about making granola or, in this case, granola bars is that you probably have all of the ingredients you need right at home -- as long as you keep a well-stocked pantry (which reminds me that I still need to tell you about my amazing, walk-in pantry. I hope to get to that soon). The other nice thing is that you can totally create a granola bar with the flavors you love, instead of being stuck with the selection on the grocery store shelf. I even took a few liberties with the recipe I followed -- it called for dried fruits; I wanted chocolate.

Homemade Chocolate Granola Bars
(adapted from Barefoot Contessa Back to Basics: Fabulous Flavor from Simple Ingredients -- original recipe can be found on the Food Network Web site)

Ingredients
2 cups old-fashioned oatmeal
1/2 cup sliced almonds
1/2 cup chopped hazelnuts
1 cup shredded coconut, loosely packed
1/2 cup toasted wheat germ (I only had raw wheat germ, so I threw it in the toaster oven for a couple minutes)
3 tablespoons unsalted butter
2/3 cup honey
1/4 cup light brown sugar, lightly packed
1 1/2 teaspoons pure vanilla extract
1/4 teaspoon kosher salt
Small handful semisweet chocolate chips
Small handful bittersweet chocolate chips
Small handful milk chocolate chips
Small handful butterscotch chocolate chips
Mini chocolate chips for topping

Preparation

Preheat the oven to 350 degrees. Butter an 8- by 12-inch baking dish (or something close in size) and line it with parchment paper.

Toss the oatmeal, almonds, hazelnuts, and coconut together on a sheet pan and bake for 10 to 12 minutes, stirring occasionally, until lightly browned. Transfer the mixture to a large mixing bowl and stir in the wheat germ.


Reduce the oven temperature to 300 degrees. (I don't usually do this, but I completely overlooked this step. Not lowering my oven temp might explain why the edges of my bars were quite crunchy.)

Place the butter, honey, brown sugar, vanilla, and salt in a small saucepan and bring to a boil over medium heat. Cook and stir for a minute, then pour over the toasted oatmeal mixture. Stir well.


Toss in chips (except for minis), and stir to combine. Chips will get melty.


Pour the mixture into the prepared pan and use a spatula to press and smooth it. Make sure to spread the mixture evenly. (My edges were a little too thin and came out a bit too crispy to eat without a toothache.) Bake for 20 to 25 minutes, until it looks set.


Let cool slightly, then toss mini chocolate chips on top.


Cool for at least 2 to 3 hours more before cutting into squares. I cut mine the next morning. Use a sharp, sturdy knife and cut into squares or bars.


Aside from the crisp edges, these bars came out chewy with a nice crunch from the toasted nuts. I loved all the chocolate, and the butterscotch chips and honey added a sweetness and distinct flavoring.

For me, two of these bars make an ideal breakfast, especially since I made them in time for our first morning back at the gym after about a month-long hiatus. I got home, showered, had my coffee, and stole a small piece of a granola bar to try. Then I brought two bars to work with me. All the protein kept me going, and the chocolate made me so happy. And I may have just nibbled on some more for an after-work snack!

Well, you've seen my nutty, chocolatey granola bars, so now I want to know what your perfect granola bar has in it and if you've ever made your own granola bars. Can't wait to hear from you!

7.22.2009

Cherry-Chocolate-Toasted Almond Pancakes


We usually have tons of errands to run on the weekend, so we get up and get going on Saturdays, grabbing food and coffee while we're out and about, but Sundays are different. Sunday mornings are always the best mornings for a leisurely breakfast.


The question is usually "pancakes or waffles?" This past Sunday, the answer was pancakes. Plain old buttermilk ones for the boyfriend and something exciting and interesting for me. I rummaged through the fridge and pantry, finally coming up with fresh cherries, Ghirardelli bittersweet chocolate chips, and slivered almonds. (Olga of Mango & Tomato was my inspiration for using the fresh cherries. I'm not sure I would have thought to throw them in if I hadn't seen her do it.)

I quartered the cherries, coarsely chopped the chocolate chips, and toasted the slivered almonds. Just looking at those ingredients, I knew these were going to be some tasty pancakes.

quartered cherries
toasted, slivered almonds and bittersweet chocolate chips
With the cherries, chocolate, and almonds ready to go, I made my usual buttermilk pancake recipe from Pancakes And Waffles. (It's a great book, and you can get it at a discount using the coupon in my sidebar!) The recipe makes amazing pancakes, but it does use a few bowls -- one for dry ingredients, one for egg yolks and buttermilk, one for egg whites, and one for melting the butter. You also need two mixers. I use my KitchenAid for the yolks and buttermilk and my handheld mixer for the egg whites. I could probably follow a simpler recipe, but I love the fluffy pancakes that result from folding in the egg whites.


I took a little less than half of the batter and poured it into a small bowl, where I added my chocolate, cherries, and nuts.


The untainted (or boring) half of the batter was left for my boyfriend, who prefers his pancakes unadorned. I don't blame him. Every once in a while I really enjoy plain pancakes too.

The nice thing about using my panini grill to make pancakes is that it has two sides. I used one side for the plain pancakes and one side for the cherry pancakes, just in case any chocolate got the idea to sneak out. I didn't want to risk marring the plain pancakes.


Sunday breakfast lived up to my high expectations. The cherries were sweet yet tangy, chocolate always wins in my book, and toasting the almonds beforehand gave them deeper flavor -- more nuttiness. And I know my boyfriend was happy with his stack of light, buttery pancakes too.


What do you like in your pancakes?

7.14.2009

Beef Fajitas


My boyfriend and I get Mexican cravings pretty often. We used to go to a little carryout place down the street, but it's been awfully disappointing lately. Sometimes we resort to the box of Ortega or Old El Paso and make some tacos. But when I saw Gaby's post on beef fajitas over at What's Gaby Cooking, I decided I could forgo the box and the takeout place and satiate our Mexican cravings by making fajitas from scratch.

Gaby's marinade recipe sounded so refreshing and tantalizing -- with cilantro and lime juice -- that I really wanted to make the fajitas right away, but it actually took a couple weeks before I got around to it. Head over to her blog for the marinade ingredients. (I used all but the jalapenos for mine.)

I mixed the marinade together right in a Ziploc gallon size bag, shook it up, added three sirloin strip steaks, and shook it again, this time lightly, so the steaks got all coated with marinade. I left them in the fridge until the next night, turning the bag over occasionally during that time so both sides of the steaks could soak up the tangy marinade.

When it was time to prepare dinner, I whipped up some guacamole first, so the flavors would have time to marry while I made the rest of the food.

Quick Guacamole For One
Mash 1 avocado in a small bowl with the back of a fork. Squeeze in a wedge of lime (1/4 of the lime), and season with a little salt and pepper and garlic powder. Set aside.

Then I chopped up 1 red pepper, 1/2 yellow pepper, 1/2 orange pepper, 1/2 green pepper, and a medium-size onion. I tossed these in a large bowl with some vegetable oil, salt and pepper, onion powder, and a smidge of chili powder. I dumped the veggies into a pan warmed over medium-high heat, sauteeing them until they were heated through and still crisp-tender, and then tossed them back in the bowl and covered the bowl with foil.


Then I took my marinated steaks and rested them in the hot pan the veggies had just vacated, where they immediately started sizzling. Once they were cooked to medium to medium-rare (you may have to slice them ahead if the steaks are really thick), I took them out and sliced them up and then popped two flour tortillas in the oven, which I had preheated to 350 when I started cooking the veggies.

Finally, all prep and cooking done, we each assembled our own fajitas -- mine with cheese, steak, veggies, and heaps of guacamole...


...and my boyfriend's with everything but guacamole. Every bite was packed with flavor.


Thanks for a great recipe, Gaby!

7.09.2009

Knockoff Nilla Wafers


I'm not usually a fan of knockoffs. I bought a knockoff Coach bag once, just once. I returned it when the straps broke a week later and stuck to the real thing from then on. None of my real Coach bags have ever broken, even when supporting the weight of my laptop and the things I can never leave the house without. You can see why I'm a bit turned off by impostors.

But after making these cookies, I've decided there's a place in my life for some knockoffs, specifically the food variety. While these cookies don't taste much like Nilla Wafers, nor do they have the same texture, they sure are good. I'd actually have to say I like them better than the original. They have a pure, rather than processed, hint of vanilla and a crumbly, crunchy texture.

I found the recipe for them on Ezra Pound Cake, a blog I love to read and, well, just stare at the pictures on too. Rebecca always shares great recipes. When she posted about her homemade vanilla wafers, I was in a baking mood. And when she suggested that all the ingredients in these cookies are probably ones I had on hand, I got up and checked. Sure enough, I could make these cookies without a trip to the store. I bet you could too.

My first step was to take some butter out of the fridge to soften. Then I gathered the rest of the ingredients and did a few other things around the house, and by the time I was done, the butter had softened and I could make the dough.

It's such an easy dough. Cream butter and sugar, add egg yolks and vanilla, add dry ingredients (flour and salt), and you're done. I split the dough into 4 pieces and rolled each into a log of barely an inch diameter -- I like small cookies, mind you -- using a piece of parchment paper to help me guide the dough and ultimately end up as its wrapper.

I put all 4 logs in the fridge and actually waited until the next night to bake them because 2 hours after I finished making the dough brought me to 10:30 pm -- almost bedtime! So the next night, I sliced two of the logs into rounds about 1/4-inch thick, and I put the remaining two logs in the freezer, where miraculously they still are. And then I baked the rounds until their bottoms glowed light golden-brown. They looked adorable.


The cookies are a little plain -- like sugar cookies without any frosting or decor -- which for some people is perfectly fine. My boyfriend loved them that way.


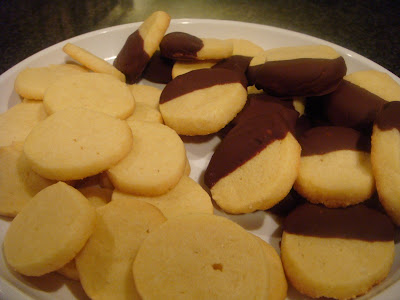
Rebecca made them to go in a banana pudding ice cream, which I think sounds delightful. I didn't have time to make ice cream, nor did I have the ingredients for it, so I decided to kick my cookies up a notch by dipping them in chocolate. I left some plain and half-coated the rest, some in semisweet and some in bittersweet.


I would eat them either way -- chocolate dipped or plain, even with ice cream (as ice cream sandwiches?). If you're looking for a simple, fairly effortless, tasty cookie, be sure to click over to Rebecca's blog for the recipe.


To chocolate dip yours, just melt a handful or so of chocolate chips in a small bowl in the microwave. I usually do 30 seconds, then stir, and then another 30 seconds, until smooth. (Be super careful if doing this with white chocolate. I would say check it and stir it every 15 seconds.) Then just take a cookie, dunk it in, use a fork to help coat it if it's stubborn, and then lift it out and set it on some wax paper to harden. I put the wax paper on a small cutting board so I could easily transport the cookies to the fridge once they were all dipped -- this helps them harden.

7.07.2009

Mini Lemon Cheesecake Squares With Raspberries


These small squares of luscious, lemony cheesecake topped with raspberries made their debut at my little sister's college graduation party this past weekend. Her four years at Carnegie Mellon deserved some recognition!

Lindsay loves cheesecake and she also loves lemon squares -- and she's been known to order the lemon raspberry cream cheesecake at The Cheesecake Factory more than once -- so when I saw a recipe for lemon cheesecake squares in the July issue of Bon Appetit, I wanted to make them for her party, and I wanted to top them not with blueberries, not with blackberries, but with raspberries.

The day before the party, I made these, doubling the recipe, and ended up with a foil-lined 9- by 13- inch pan full of graham cracker-crusted cheesecake. To transport the bars, I left them right in the pan and snapped the pink lid on top. (I brought a bowl of fresh raspberries on the side.) The bars easily endured the 2-hour drive to Connecticut. When I arrived at my parents' house -- the party venue -- I put the pan on the dining room table and in the brief moment I turned away and turned back, my mother had deftly lifted the bars from the pan, using the foil overhang, and set them on a cutting board.

By now you may know of my obsession with mini things. If you don't, I'll make this quick: I love them. Especially mini foods. When it comes to food at parties, I think the smaller the better. I want to be able to taste everything, and mini foods make that much more achievable. (Keep in mind I just mean smaller size, not less food!)
So I cut the cheesecake into small squares, just big enough to accommodate a raspberry. I perched the raspberries, like shiny jewels, atop their cheesecake stands. The whole ensemble looked stunning.

When it came time to pass the desserts around, I offered up the squares to any eager takers. Tasters commented on the perfect creaminess of the cheesecake. The squares were a huge hit. And, most important, I think the graduate enjoyed them too.


Some Other Raspberry Treats

I came across these in my Google Reader today and thought you might enjoy them too!

7.02.2009

My First Batch Of Hummus

hummus
I hate chickpeas -- garbanzo beans, whatever you want to call them. I absolutely despise them. They are coarse and dry, simply unpleasant.

Back when I was in high school, one of my friends always made herself a salad rampant with chickpeas for lunch. She would take one from her plate and position it on my tray to stare at me and torment me. Yes, I hate them that much.

But I LOVE hummus. And the main ingredient in hummus is those horrid, little beans. So how does that work? Well, hummus is creamy. The dry, grainy chickpeas get processed with olive oil and tahini, resulting in a smooth, creamy mixture.

If you're a chickpea hater too, I encourage you to try them in other forms, like hummus or falafel (yum). In their natural state, they're not much to look at or savor, but with a little work, they can be quite stunning.

I found this recipe in Entertaining from Cook's Illustrated. As with all Cook's Illustrated recipes, you can't get this one online unless you subscribe to the site, so go get the summer of issue of Entertaining, or sign up for a trial membership for access to this hummus recipe. It's flavorful and has the perfect texture.

I'm very picky about hummus. My favorite store-bought kind is Sabra because of its velvety texture. It's incredibly creamy and never chalky or pasty, like some others I've tried. I enjoy it whether plain, with roasted red peppers, or with roasted garlic. Every flavor I've tried has been so fulfilling. This version, which Cook's Illustrated calls Restaurant-Style Hummus, comes out similar to Sabra's.

You don't need many ingredients. The most difficult thing to find was tahini paste -- only because I've never used it before. Luckily, Cook's Illustrated recommended a brand and included a picture, so I knew just what to look for. Then it's just chickpeas, lemons, garlic, oil, and spices.

I think hummus is best served with Stacy's chips, pita bread, or peppers, and this time I was in the mood for chips.

hummus ingredients
Making my way through this recipe, I learned that hummus is incredibly easy to make. Chickpeas, garlic, and spices go for a spin in the food processor.

chickpeas in food processor
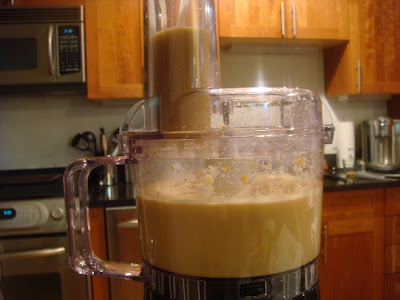
Then let the lemon juice and oil and tahini drip in while the processor is running. I love the tube on my food processor designed for this, but sometimes I feel like the liquids drip in too slowly. This was one of those times, so I had to tip it over and pour slowly instead. Processed for a bit longer, the whole mixture ended up nice and creamy.

hummus in food processor
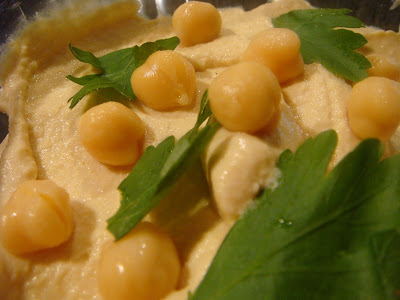
After letting the flavors meld for a bit, I drizzled some oil over the hummus and then tore open a bag of chips and tested it out. It wasn't too bad for a first batch. I thought it was tasty, overall, but I'm looking forward to enhancing the flavor. I'll be trying the lemon-artichoke and roasted red pepper hummus recipes next. Once you get the basic recipe down, I'm sure there are lots of ways to play around with it.

hummus

Do you have any fabulous chickpea recipes like hummus to recommend -- ones that even I might like?