1.30.2011

Cocoa Brownies With Brown Butter And Walnuts


Another big snowstorm is on its way this week, and Boston is basically already bursting at the seams with snow. We've run out of places to put it, getting around is treacherous -- both walking and driving -- and it no longer looks very pretty. The snow is slushy in some places, mixed with mud and salt, and piled up taller than me.

At least Gunner loves the snow piles!
(That fence is 6 feet high!)
When the outside world is not too inviting and the weather is downright menacing, I like to stay holed up inside and often wonder why humans can't hibernate too. We all seem to have this go-go-go mentality, and I know that working and making money and contributions to society are all important, but sometimes it would be nice to just take a breather. My office never closes, and that makes me especially bitter (it's not like we save lives or do anything that couldn't be put off for a day). At least I can work from home when the weather is bad, but that's not the same as having a day to just lounge around, watch movies, hang out with Jeff and Gunner, and enjoy life. Between the frightful weather and my depression at having to work in the midst of snowstorms that cause the whole rest of the city to shut down, I find myself craving good old comfort food.


When the February issue of Bon Appetit arrived in our mailbox, it was immediately clear to me what particular comfort food I needed: brownies. There on the cover was a stunning stack of shiny, fudgy brownies, studded with walnuts. The magazine touted them as the "best-ever brownies," and that and the picture convinced me I needed to make them. So last night, in preparation for this week's impending storm, I quickly whipped up a pan of them.


The recipe didn't call for the walnuts to be toasted, but I always like to toast nuts that will be incorporated into baked goods when I want a richer, "nuttier" flavor. Between that and the browned butter in these -- and my upgrade of the vanilla extract to Tahitian vanilla extract -- the brownies definitely get a deep, complex flavor. And if you follow the baking instructions and don't overbake these (very important), you'll get that nice, fudgy texture that every perfect brownie should have. I hope you get a chance to make and enjoy these brownies soon... especially if there's a snowstorm on its way to your area.


Cocoa Brownies With Browned Butter And Walnuts (adapted from Bon Appetit, February 2011)
(Print this recipe)

Ingredients

Nonstick baking spray
1 1/4 cups sugar
3/4 cup natural unsweetened cocoa powder
1/4 teaspoon kosher salt
10 tablespoons unsalted butter, cut in 1-inch pieces
2 teaspoons water
1 teaspoon Tahitian vanilla extract
2 large eggs (straight from the fridge)
1/3 cup plus tablespoon flour
1 cup walnut pieces, toasted

Preparation

Preheat oven to 325 degrees. Line an 8x8x2-inch metal pan with foil, leaving a 2-inch overhang, and spray the pan with nonstick baking spray.

Combine the sugar, cocoa powder, and salt in a small bowl, and set aside.

Melt butter in a medium saucepan over medium heat, and continue cooking and frequently swirling the pan until butter stops foaming and there are brown bits in the bottom of the pan, about 5 to 8 minutes.


Remove the pan from the heat, and immediately dump in the sugar-cocoa mixture. Add the water and vanilla, and stir to combine.


Let cool 5 minutes, and then add the eggs one at a time, beating vigorously after each addition with a firm rubber spatula or wooden spoon.


Add the flour, and stir until blended. Then beat vigorously for 60 strokes.


Stir in the nuts.


Transfer the batter to the prepared pan, and smooth the top.

Bake brownies until toothpick inserted in center comes out with only moist crumbs attached, about 25 to 30 minutes.


Cool in pan on rack.


Cut into squares, and serve.


While I wouldn't go so far as to say these are the best brownies, I thoroughly enjoyed them, and they even got a "very good" from Jeff. They are rich, soft, and fudgy, and I love how the walnuts add texture to these, even though I usually add chocolate chips and chunks to brownies as opposed to nuts.


What's your favorite brownie recipe? And are you sick of the snow?

1.28.2011

Chicken En Croute Fiona Style


In The French Women Don't Get Fat Cookbook, Mireille Giuliano writes, "...the lighter my dinner is, the better I sleep, and the better I feel the next day." You can see her affinity for light dinners throughout the dinner chapter of the cookbook, but just because the dinners are light, that doesn't mean you have to worry about going to bed hungry.

I made her chicken en croute Fiona style for Jeff and I one evening and paired the light, citrusy chicken with a little bit of spinach and pasta to make a complete meal. There would also be plenty to eat if you served the chicken with some salad greens as Giuliano suggests.

Chicken En Croute Fiona Style (adapted from The French Women Don't Get Fat Cookbook)

I cut the recipe to serve two.

Ingredients

Zest of 1 lemon
Zest of 1 orange
1 garlic clove, minced
3 tablespoons fresh parsley
2 teaspoons minced fresh rosemary
1/2 cup grated parmesan
1 teaspoon olive oil
Salt and freshly ground pepper
1 egg
2 boneless, skinless chicken breasts, pounded to 1/3-inch thickness

Preparation

Preheat oven to 400 degrees. Line a baking sheet with aluminum foil.

In a shallow bowl (or fancy-schmancy breading tray), combine zests, garlic, parsley, rosemary, Parmesan, and olive, and season to tastes with salt and pepper.


In another shallow bowl (or fancy-schmancy breading tray), whisk the egg.


Dip each chicken breast in the egg, and allow the excess to drip off. And then dip the chicken into the herb-Parmesan mixture, pressing and flipping to coat each side.


Place the chicken on the prepared baking sheet, and bake for about 20 minutes, or until chicken is cooked through.


Serve immediately.


I usually coat chicken with bread crumbs and loved this citrusy crust as an alternative. How do you add flavor and texture to plain old, boneless, skinless chicken breasts?

"The greatest and deepest pleasure in food exists in the first three bites. So eat with all of your senses and then let your brain kick in after three bites." - Mireille Giuliano

1.27.2011

Short Ribs Fail

Have you ever set out to make an incredible recipe in your kitchen only to have it fail miserably?

This is what happened to me a couple weekends ago. We were having friends over for dinner, and I really wanted to make short ribs. I searched around and thought I found a great, reliable recipe from Tom Colicchio on Food & Wine's website. I figured I couldn't possibly go wrong with a recipe from two sources I trust.

I started the night before, following the recipe all the way through. I heated oil in a large skillet and seasoned the short ribs with salt and pepper. I browned the short ribs on both sides, about 9 minutes per side, as the recipe instructed.


Then I transferred the ribs to a shallow baking dish.


I added onions, carrots, celery, and garlic to the still-hot skillet and sauteed these over low heat for 20 minutes.


Then I added wine and thyme sprigs to the skillet.


I brought the wine to a boil and poured the hot marinade over the short ribs. I set the dish aside to cool and then covered it and put it in the fridge overnight. (I did forget that I was supposed to turn the ribs once while they were marinating, but I don't think that mattered much because the meat was all submerged.)


The following evening, I preheated the oven to 350 and transferred the ribs and marinade from the shallow baking dish to my cast iron Dutch oven.


I poured the chicken stock in, and heated the mixture on the stove until it came to a boil. Then I covered the Dutch oven and put it in the oven for an hour and a half.


After that, I uncovered the short ribs and left them in the oven for another 45 minutes. The sauce should have been reduced by half at this point, but I don't think it was. (Should I have continued cooking the ribs uncovered?)


I transferred the short ribs to a shallow baking dish, poured the sauce through a fine-mesh sieve, and then poured the strained sauce over the short ribs. I covered the ribs and left them to sit in the turned off oven until our guests arrived and we were ready for dinner (probably an hour), and then I heated them under the broiler (this seemed weird but that's what the recipe said to do).


I brought them to the table, and we all piled buttermilk mashed potatoes on our plates along with a short rib each. We topped our short ribs with extra sauce and started to dig in. I had high hopes for fall-apart, tender meat, but the meat was chewy and tough, and I needed to use a knife. I was so disappointed (I didn't even take pictures of the end result). Everyone comforted me by saying they were good and had great flavor. And while I agree that the flavor was pretty good, the ribs themselves were not good.

We had two ribs leftover from the dinner, and I ended up putting them in the oven a couple days later at 325 for about an hour. They were much better after that. But how could the cooking time possibly be that far off?


What went wrong? Have you made short ribs before? Do you have any tips or recipes for me?

1.26.2011

A Perfect Pairing: Muir Glen And Chef Will Gilson

Photo courtesy of Muir Glen
On Monday night, I had the opportunity to attend a tomato tasting dinner courtesy of Muir Glen and Garden at the Cellar, one of my favorite restaurants and a stop on the Muir Glen Tomato Vine Dining Tour. Muir Glen teamed up with five award-winning chefs across the country to create the tour. These chefs actually traveled out to Yolo County, Calif., back in August to help harvest this year's limited edition Meridian Ruby tomatoes.

Photo courtesy of Muir Glen
The five chefs then created recipes using the Meridian Ruby tomatoes and are featuring those dishes at their restaurants for a limited time. To kick off the addition of these dishes to Garden at the Cellar's winter menu, Muir Glen and Executive Chef Will Gilson held a tasting of the dishes. I was lucky enough to be invited to this special tasting. As a lover of Muir Glen tomatoes and Garden at the Cellar, it took me only moments to RSVP yes to this event.

Chef Will is known for using local, seasonal ingredients, but even he can admit that it's pretty impossible to get local tomatoes here in the Boston area at this time of year. The restaurant had been importing tomatoes from Italy and was able to go a little more local after pairing up with Muir Glen. Chef Will describes the tomatoes as "perfect for anyone who is looking to bring a bright tomato flavor to their favorite dish." This bright tomato flavor was evident in all of the dishes we tried at Garden at the Cellar on Monday night.

Photo courtesy of Muir Glen
The Tomato Tasting

Monday night was exceptionally cold, and Garden at the Cellar was the perfect place to be on such a chilly evening. I started to warm up as soon as I got inside. I found Meghan and Brian, and we all headed to the bar for a glass of wine and checked in with each other to see if we had recovered enough from Sunday's brunch to eat more -- of course, we had.


Soon after I had a few sips of wine -- a smooth, easy-to-drink red -- the bartender set out plates of flatbread pizza with smoked tomatoes and roasted cauliflower.


I had never had cauliflower on a pizza, and it's now something I might make at home. I loved this little bite, with deep tomato flavor.


Next came a platter of grilled bruschetta with tomato, eggplant, and smoked feta. This reminded me just a little of a Muir Glen recipe I made a while back with fire roasted tomatoes and feta but was kicked up with the addition of eggplant.


I think all of our eyes popped out of our heads when we caught sight of the slow-cooked pork belly with sweet and sour tomato jam set out on pig-shaped cutting boards.


The pork belly was absolutely heavenly. It was so crisp and the fat just kind of melted away in my mouth. It was everything pork belly should be. And the tomatoes were the perfect complement.


Chef Will later told us that the pig came from a farm in Connecticut, and he cooked the pork belly sous vide. I think part of the amazing flavor is owed to the fact that the pig was so fresh, not having to spend much time in transit, while the rest is owed to Chef Will's way with pork. (Meghan even got a tweet from @GardenatCellar during dinner that said they don't call Will "Notorious P.I.G." for no reason!)

The last appetizer was the famous tomato soup in shooter form with wedges of grilled cheese sandwiches. Chef Will joked that this soup is what pays his mortgage, and yeah, it's that good. It has such rich tomato flavor and it's so creamy. And who can deny that tomato soup and grilled cheese is one of the best combinations? I can't wait to make this soup at home!


After we snacked and sampled all of the appetizers, we made our way to the tables, listened to an introduction from Muir Glen and from Chef Will, and got ready for the "larger fare."

First to the table was a local seafood and tomato stew served in a wooden bowl. With each bite of the stew, I got the strong flavor of cilantro, the sweetness of tomatoes, and then a little kick at the back of the throat.


I could definitely go back for more of that stew.


After the stew, we were brought two dishes intended to be served family style. I had Meghan, Brian, Katie, and Rachel at my table, and somehow, despite the deliciousness of the dishes, we managed to share nicely with each other.


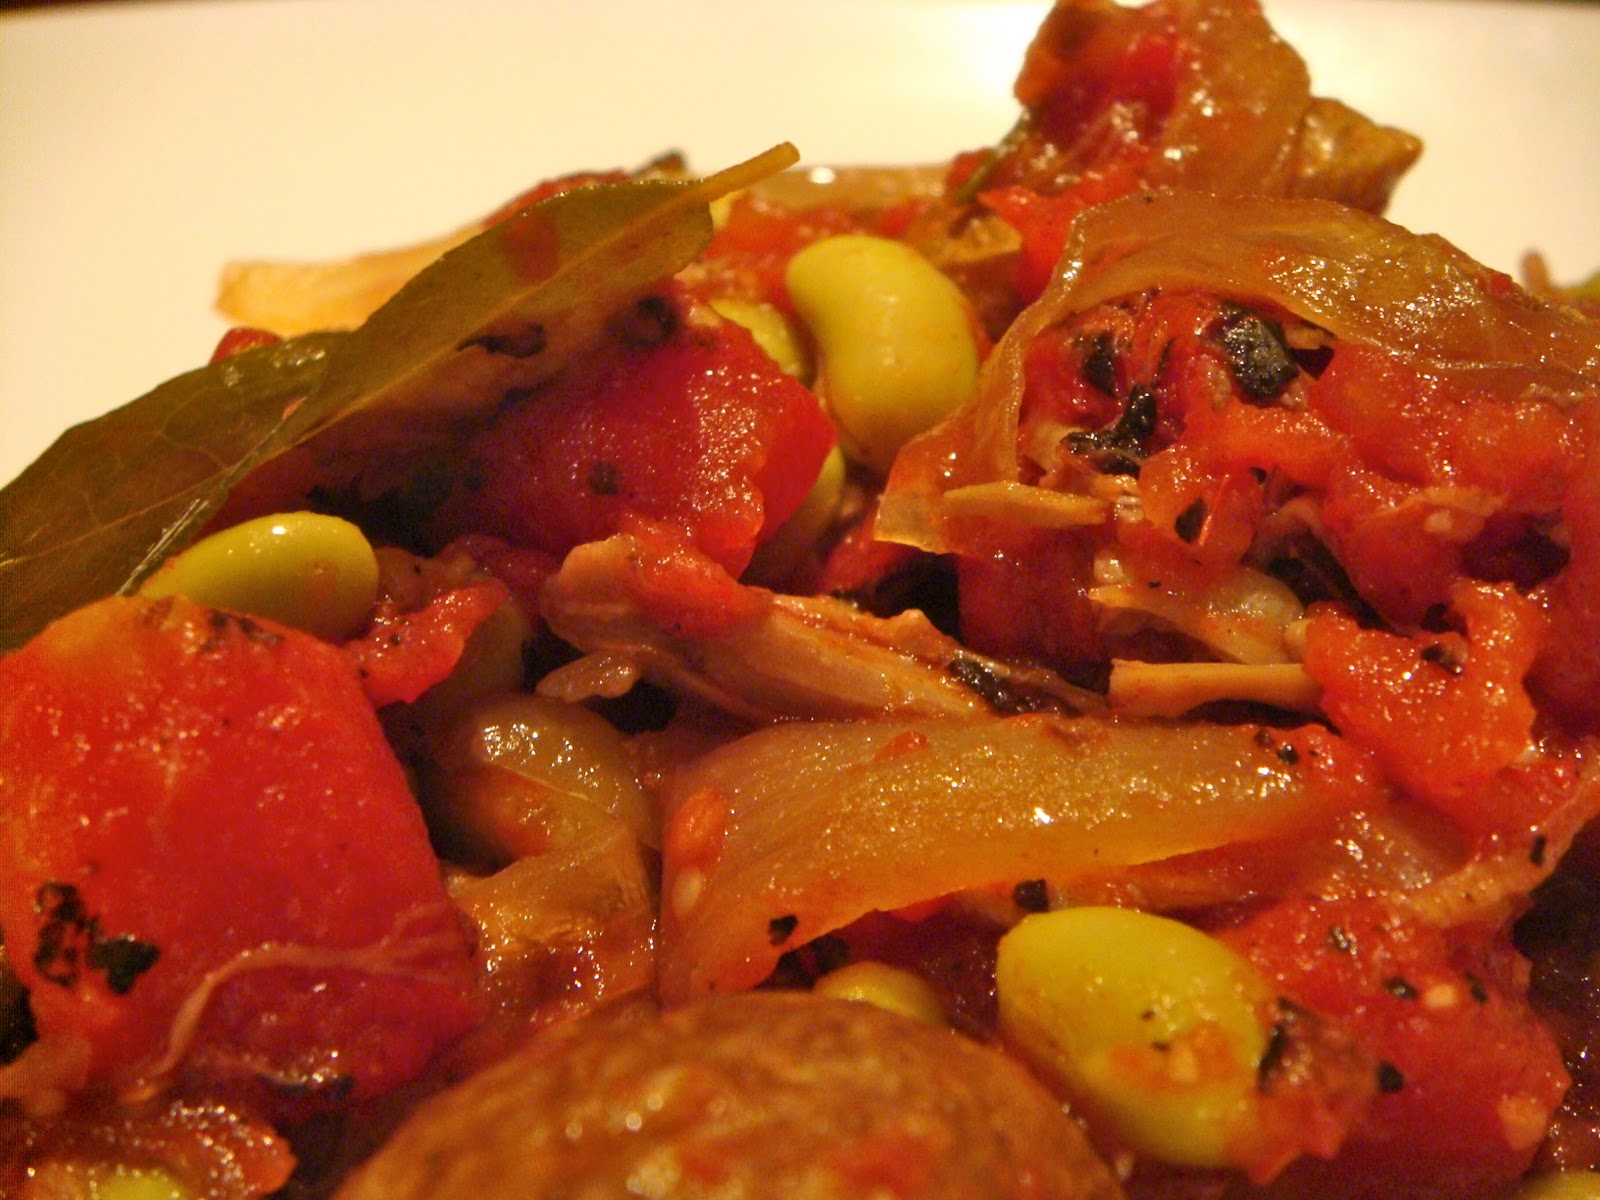
I tried the braised lamb with tomato and curry leaf confit and edamame first.


I was a little wary of this dish because curry is one flavor I cannot grow to love, much as I might try. Fortunately, there was no strong flavor of curry in this dish. I'm not even sure I tasted a hint of it. What I did get was tender lamb, mixed with soft tomatoes and potatoes, and waxy edamame.


After the lamb, I dug into the pasta with grilled sausage and parmesan. The sausage was so garlicky -- in a good way, of course. I can never get enough garlic. And the whole dish was very simple and rustic, like many dishes at the Garden. I could definitely see myself making this one at home as well.


The entire evening was perfect, and it was encouraging to see a local chef incorporating the canned tomatoes in his dishes. Muir Glen hopes this will inspire home cooks to use the flavorful tomatoes when they can't access locally grown tomatoes as well. I've already made one recipe from the Muir Glen Tomato Vine Dining Tour recipe book (hoping to have a post up soon), and I can't wait to try some of the others. And I know I'll continue to use Muir Glen tomatoes in the tomato dishes I make regularly at home.

Thank you to Muir Glen and Chef Will for this incredible evening filled with so many dishes using one of my favorite vegetables (or fruits, if you want to get technical!).

A Few Words About Muir Glen Reserve Tomatoes

While I was already a huge fan of Muir Glen (cooking with their canned tomatoes often), last year I became an even bigger fan when I discovered Muir Glen's limited edition Reserve Tomatoes. I ordered two crates of these tomatoes last year, and when I saw there was another variety of Reserve Tomatoes available this year, I ordered another two crates. You can imagine my delight when I found out our after-dinner parting gift was yet another crate!

Photo courtesy of Muir Glen
The Reserve Tomatoes are grown under certified organic practices, hand-harvested at the peak of ripeness, and canned within 8 hours, so they have amazing flavor. The crates are $8 each (shipping is free) and include one can of Meridian Ruby Diced Tomatoes, one can of Meridian Ruby Fire Roasted Tomatoes, one can of Chipotle Seasoned Petite Diced Tomatoes, and one can of Tomato Sauce. You can order them by joining the Muir Glen Connoisseur's Club, and I highly recommend that you do because each crate also contains a booklet of recipes created by the five chefs on the Tomato Vine Dining Tour. (That means you can make Chef Will's tomato soup!)


Have you tried Muir Glen tomatoes? Have you been to Garden at the Cellar? What's one of your favorite winter tomato dishes?