I'm not usually a fan of knockoffs. I bought a knockoff Coach bag once, just once. I returned it when the straps broke a week later and stuck to the real thing from then on. None of my real Coach bags have ever broken, even when supporting the weight of my laptop and the things I can never leave the house without. You can see why I'm a bit turned off by impostors.
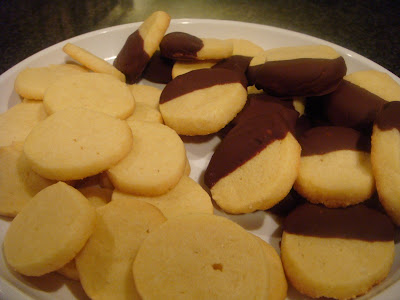
But after making these cookies, I've decided there's a place in my life for some knockoffs, specifically the food variety. While these cookies don't taste much like Nilla Wafers, nor do they have the same texture, they sure are good. I'd actually have to say I like them better than the original. They have a pure, rather than processed, hint of vanilla and a crumbly, crunchy texture.
I found the recipe for them on Ezra Pound Cake, a blog I love to read and, well, just stare at the pictures on too. Rebecca always shares great recipes. When she posted about her homemade vanilla wafers, I was in a baking mood. And when she suggested that all the ingredients in these cookies are probably ones I had on hand, I got up and checked. Sure enough, I could make these cookies without a trip to the store. I bet you could too.
My first step was to take some butter out of the fridge to soften. Then I gathered the rest of the ingredients and did a few other things around the house, and by the time I was done, the butter had softened and I could make the dough.
It's such an easy dough. Cream butter and sugar, add egg yolks and vanilla, add dry ingredients (flour and salt), and you're done. I split the dough into 4 pieces and rolled each into a log of barely an inch diameter -- I like small cookies, mind you -- using a piece of parchment paper to help me guide the dough and ultimately end up as its wrapper.
I put all 4 logs in the fridge and actually waited until the next night to bake them because 2 hours after I finished making the dough brought me to 10:30 pm -- almost bedtime! So the next night, I sliced two of the logs into rounds about 1/4-inch thick, and I put the remaining two logs in the freezer, where miraculously they still are. And then I baked the rounds until their bottoms glowed light golden-brown. They looked adorable.

The cookies are a little plain -- like sugar cookies without any frosting or decor -- which for some people is perfectly fine. My boyfriend loved them that way.

Rebecca made them to go in a banana pudding ice cream, which I think sounds delightful. I didn't have time to make ice cream, nor did I have the ingredients for it, so I decided to kick my cookies up a notch by dipping them in chocolate. I left some plain and half-coated the rest, some in semisweet and some in bittersweet.

I would eat them either way -- chocolate dipped or plain, even with ice cream (as ice cream sandwiches?). If you're looking for a simple, fairly effortless, tasty cookie, be sure to click over to Rebecca's blog for the recipe.

To chocolate dip yours, just melt a handful or so of chocolate chips in a small bowl in the microwave. I usually do 30 seconds, then stir, and then another 30 seconds, until smooth. (Be super careful if doing this with white chocolate. I would say check it and stir it every 15 seconds.) Then just take a cookie, dunk it in, use a fork to help coat it if it's stubborn, and then lift it out and set it on some wax paper to harden. I put the wax paper on a small cutting board so I could easily transport the cookies to the fridge once they were all dipped -- this helps them harden.
