11.30.2011

Baked Pumpkin Oatmeal With Greek Yogurt

Baked pumpkin oatmeal with Greek yogurt

When it comes to breakfast, I'm most likely to get excited about egg dishes, like eggs Benedict, interesting takes on eggs Benedict, veggie-laden omelets, and egg sandwiches on soft rolls. I rarely get excited about things like oatmeal. And I won't even claim that this particular oatmeal recipe is going on my favorite breakfast dishes list. But I will say that it is flavorful, warming, and filling -- and that's just what I need in the morning before embarking on my 45-minute-plus walk/T-ride to work.

Baked pumpkin oatmeal with Greek yogurt

I'd been eating toast with avocado slices or bagels with cream cheese until I made this oatmeal. My other breakfasts would have my stomach grumbling shortly after I arrived at work, but the oatmeal keeps my stomach quiet until almost 11. That's when I dig into a granola bar, homemade granola, or something similar for my second breakfast. (And usually shortly after that there are tons of tastings in the kitchen -- which equals lots of stuff to keep me full for the rest of the day.)

I first read about this baked oatmeal on The Clean Plate Club and followed Alicia's link back to the kitchn, where I found the original recipe. I modified the recipe slightly, mainly subbing Silk for milk and serving the sweet, spicy oatmeal with tangy Greek yogurt. (The Greek yogurt packs some extra protein.)


The recipe is fairly hands-off, especially for steel-cut oats, which were pretty much my nemesis when I worked at Flour. (I can't tell you how hard it is to bake cupcakes, prepare tarts, and finish cakes while constantly running over to the stove to stir oatmeal.) It requires a little mixing on the stove and then goes in the oven for about a half-hour. After that, you can let it cool, store it in the fridge, and simply microwave a serving each morning.

Baked pumpkin oatmeal with Greek yogurt

Baked Pumpkin Oatmeal With Greek Yogurt (adapted from Not Your Mother's Casseroles via the kitchn)

Ingredients

2 tablespoons unsalted butter
1 1/2 cups steel-cut oats (I used Bob's Red Mill)
1 cup pumpkin puree
1/3 cup brown sugar
1 teaspoon cinnamon
1 teaspoon ginger
1/2 teaspoon cloves
1/4 teaspoon nutmeg
2 cups Silk Vanilla Soymilk
2 1/2 cups warm water
1 teaspoon vanilla
1/2 teaspoon salt
Greek yogurt
Maple syrup

Preparation

Heat oven to 375 degrees.

Melt 1 tablespoon butter in Dutch oven set over medium-high heat. Stir in the oats, and fry them, stirring frequently, for about 3 minutes, until they look and smell toasty.


Create a well in the center of the oats and drop the remaining 1 tablespoon butter in the well. Add the pumpkin puree, and fry it in the butter, stirring after about 1 minute.


Stir in sugar and spices, and fry for another 3 to 4 minutes, until puree darkens sightly.


Stir in soymilk, water, vanilla, and salt.


Cover pot, transfer to oven, and bake for 35 minutes.

Remove pan, uncover carefully, and stir oatmeal. Oatmeal will look loose, but it will thicken as it cools.


Serve warm, or let cool, refrigerate, and reheat in microwave. Top with a dollop of Greek yogurt and a drizzle of maple syrup.

Baked pumpkin oatmeal with Greek yogurt

It's not nearly as good as pumpkin pie, but it does make for a hearty breakfast. And I suppose it's more acceptable to eat oatmeal for breakfast.

After making this baked oatmeal, I am interested in finding other baked oatmeal recipes to simplify my mornings. If you have any suggestions, please let me know!

11.28.2011

Chocolate And Salted Caramel Pie

Chocolate and salted caramel pie

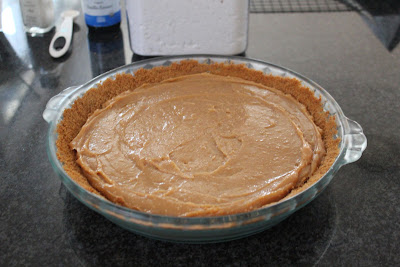
A bite of this chocolate and salted caramel pie tastes just like a bite of a candy bar -- it's sweet, salty, decadent, creamy, and crunchy all at once.

I found the recipe for salted caramel pie in Food & Wine. The pie was described as easy to make and consisting of few ingredients. I thought a little chocolate would take the pie up a notch, so I added a few more ingredients to it, but it's still really easy to make.

One of the things that makes it so easy is that the caramel filling is simply condensed milk cooked in a water bath in the oven. There's no heating sugar, monitoring its temperature, and so on while making a stovetop caramel. I was a little worried about how good this condensed milk caramel would be, and truth be told, I thought it smelled a little funny as it was cooking, but the end result was creamy, thick, and gooey with a nice caramel-y flavor.


With gooey caramel sandwiched between a graham cracker crust spread with bittersweet chocolate and light, fluffy whipped cream, the pie was just heavenly. If you love sweet, salty, candylike desserts, this is the pie for you. It's definitely one of my new favorites.

Chocolate and salted caramel pie

Chocolate And Salted Caramel Pie (adapted from Food & Wine, November 2011)

Ingredients

1 1/4 cups graham cracker crumbs
4 tablespoons unsalted butter, melted
1/4 cup light brown sugar
2 (14-ounce) cans sweetened condensed milk
Fleur de sel
5 ounces bittersweet chocolate
2 cups heavy cream
2 tablespoons confectioners' sugar
1 teaspoon vanilla

Preparation

Preheat oven to 350 degrees.

Pulse graham cracker crumbs, butter, and brown sugar in food processor until crumbs are moistened. Press crumb mixture evenly into bottom and up sides of 9-inch glass pie plate. Bake 10 minutes, or until lightly browned. Transfer to wire rack to cool, and increase oven temperature to 425 degrees.


Pour condensed milk into 9- by 13-inch glass baking dish (I didn't have one so I used a metal pan, and it worked just fine). Sprinkle with 1/2 teaspoon fleur de sel. Cover the dish with foil, and set it inside a roasting pan. Add hot water to the pan until it reaches one-third of the way up the side of the baking dish.

Bake, stirring 2 to 3 times, until condensed milk is golden and thickened, about 2 hours, adding more water to roasting pan as necessary.


Transfer caramel to a bowl and let cool.


Meanwhile, once pie crust is cool, chop and melt 4 ounces of the bittersweet chocolate. (Microwave in small bowl for 1 minute; stir until smooth.)

Pour the chocolate into the crust and spread with a small offset spatula.


Sprinkle a little fleur de sel over the chocolate. Refrigerate the crust until the chocolate has set.


Once caramel is cool and chocolate has set, pour the caramel into the pie crust and spread it evenly with an offset or rubber spatula.


Spray a piece of plastic wrap with nonstick spray, cover the pie, and refrigerate for at least 4 hours or overnight.

In bowl of stand mixer fitted with whisk attachment, whip cream with confectioners' sugar and vanilla, until stiff peaks form. Spread the whipped cream over the caramel.


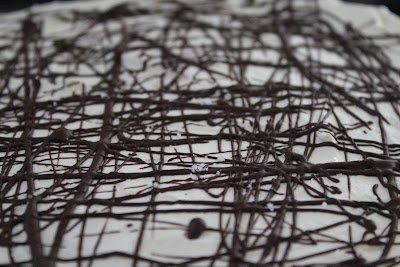
Melt the remaining 1 ounce bittersweet chocolate in microwave. Let cool slightly, and then use a fork to drizzle the chocolate over the whipped cream.

Chocolate and salted caramel pie

Sprinkle lightly with fleur de sel, and serve.

Chocolate and salted caramel pie

(Or refrigerate until ready to serve, keeping in mind that the whipped cream will hold up best for a few hours and then it may start to loosen. Mine held up for two days as we continued to eat slivers of leftover pie.)

Chocolate and salted caramel pie

The chocolate layer will make the pie a bit more difficult to cut, so I suggest letting it sit out for a few minutes before slicing it and using a heavy, sharp knife.

Chocolate and salted caramel pie

Have you had any noteworthy desserts recently?

11.26.2011

Scenes From Flavors Of Fall

A couple weeks ago, I had the opportunity to attend the 8th Annual Flavors of Fall event. I had actually attended this event back in 2008 with Jeff and one of our friends. I really enjoyed it then and thought it was a great way to get to know some of the restaurants in the neighborhood that I hadn't yet been to (not to mention that it supported a great cause: CitySprouts), so I was looking forward to checking it out again this year.

Flavors of Fall, held at Regattabar at the Charles Hotel in Cambridge, is a food-filled event that celebrates New England's fall harvest and raises funds for a different organization each year. The proceeds from this year's event went to Tutoring Plus, which supports and encourages the academic, personal, and social growth of Cambridge youth.

When I saw the list of participating restaurants for the event this year, I couldn't help but feel proud of my little neighborhood and how much the restaurant scene has grown here over the past year or so. Bergamot, Catalyst, Area Four, and Bondir were all there among old favorites like Henrietta's Table and The Blue Room. Here's just a sampling of what I tried at the event.

Apple, peanut praline, caramel powder, and Maldon salt (a sort of deconstructed caramel apple)
Garden at the Cellar

Brussels sprout popcorn with guanciale salt
The Blue Room 

Lucky 7 Farms Berkshire pork terrine with fall fruit chutney (my favorite!)
Area Four

Braised beef, Taleggio cheese, arugula, truffle oil panini
Bergamot

Pigs in a blanket
EVOO

Caramel budino
Harvest

Maple créme brûlée
Sandrine's Bistro
Flavors of Fall truly showcases some great food and supports great causes, so if you have a chance to check it out next year, I highly recommend it.

I was given a complimentary ticket to the event this year.

Have you been to any fundraising events lately?

11.23.2011

Homemade Turkey Soup (And Stock)

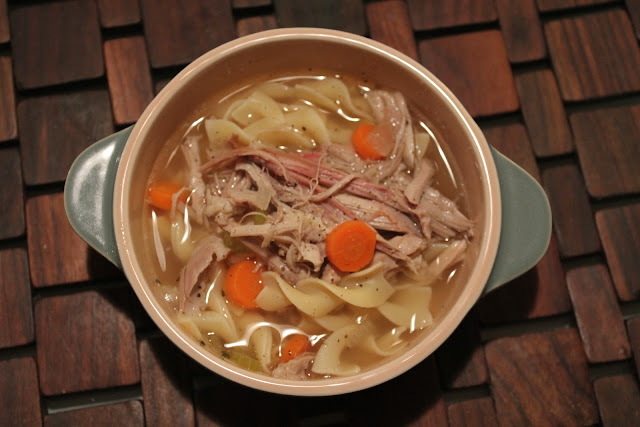
Homemade turkey soup

I'll bet a lot of you are going to have a turkey carcass hanging around on Thursday. But don't throw it away without a second thought. After the bird gets picked over, it still has something more to offer -- deeply flavored stock that can be turned into a warm, comforting turkey soup.

After I roasted a turkey and had Jeff carve it this past weekend, I took the carcass, neck, and thighs (for extra meat for the soup) and used them to make turkey stock. It doesn't take much time at all to get the stock going, and once it's going, all it needs is time and some occasional skimming. I prepped all the ingredients I'd need for the stock while the turkey roasted, so once the turkey was carved I could just throw everything in the pot.

After the stock had simmered for 4 hours, I strained it and then picked through the bones, salvaging any of the moist flavorful dark meat for the soup. I also picked over the wings, which I hadn't put in the stock, and added their meat to the pile. I had prepped all the ingredients for my soup at the same time that I had prepped the stock ingredients, so it was super easy to throw the soup together too.

If you'll have a free burner after Thanksgiving dinner has been made, you can start your stock simmering as soon as you've carved the turkey (as long as you prep the other ingredients in advance too). Before you head to bed on Thanksgiving night, your soup will be done, and you can eat it all week long in addition to your Thanksgiving dinner leftovers, or divide it among freezer bags and save it for when the next turkey craving strikes.

Homemade turkey soup

Turkey Stock (adapted from Cook's Illustrated, November 2000)

Ingredients

Carcass, neck, and thighs from 12- to 14-pound turkey
1 onion, peeled and halved
1 carrot, peeled and chopped
1 celery rib, chopped
3 garlic cloves, smashed
2 cups dry white wine
1 bay leaf
5 sprigs fresh parsley
3 sprigs fresh thyme

Preparation

Bring turkey carcass, neck, thighs, onion, carrot, celery, garlic, wine, bay leaf, and 4 1/2 quarts water to a boil in a large stockpot set over medium-high heat. Skim any fat or foam that comes to the surface of the stock.


Reduce heat to low and simmer stock, uncovered, for 2 hours, skimming when needed.

Add parsley and thyme, and simmer stock for another 2 hours.

Pour stock through strainer set over large bowl.


Pick through solids, and reserve any meat.


Cool stock for about 20 minutes, and skim any fat from its surface.

Use entire batch of stock in soup recipe below.

Turkey Noodle Soup (adapted from Cook's Illustrated, November 2000)

Ingredients

1 tablespoon reserved fat from turkey drippings or butter
1 onion, chopped fine
4 carrots, peeled and cut into 1/4-inch-thick rounds
1 celery rib, sliced 1/4 inch thick
1 tablespoon minced fresh thyme
Salt and pepper
Turkey stock (from above)
Reserved turkey meat (from above, plus additional from turkey leftovers if desired)
Egg noodles, prepared according to package directions

Preparation

In a large stockpot set over medium-high heat, melt reserved fat from turkey drippings (or butter).

Add onions, carrots, celery, thyme, and 1 teaspoon salt to the pot and sauté until vegetables are just softened, about 5 minutes.


Stir in turkey stock, and cover and simmer until vegetables are tender, about 10 minutes.

Stir in reserved turkey meat, and simmer 5 minutes to warm.

Serve soup spooned over prepared egg noodles and seasoned with salt and pepper.


Homemade turkey soup

I truly enjoyed this soup and am so excited that I have three bags of it in the freezer for future dinners.


I never listen to recipes when they say to cook the noodles in the soup because the noodles are apt to get soggy. Instead, I always make a batch of noodles on the side and simply spoon the soup over the noodles (something I learned from my mom). This way you're sure to have tender, but not mushy, noodles in every bowl. I didn't specify an amount of pasta above, so you can just make however much you'll need for however many people you're feeding.

I doubled the amount of carrots the recipe called for, and I still don't think there were enough, so next time I would probably use 6 carrots, and I'd amp up the amount of celery too. While the recipe doesn't say to sauté the vegetables first, my dad told me my soup would have more flavor if I sautéed them in some of the fat I had scooped off the turkey drippings before I made my turkey gravy, so I tried that. I can't exactly compare my soup to the original since I didn't make the original, but I know I ended up with a really delicious, flavorful soup, so I think it was a good move.

Homemade turkey soup

Do you ever make your own turkey stock or soup?

11.22.2011

Golden Cider-Roasted Turkey

Cider-roasted turkey

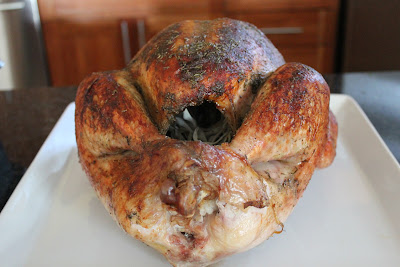
How many of you have roasted a turkey before? Would you believe this is the first whole turkey I've ever roasted? I spent a lot of time looking through recipes and finally settled on Golden Cider-Roasted Turkey from Sunday Roasts. (I had such good luck with the roast recipe in this cookbook that I figured the turkey recipe would be incredible too.) How could anyone go wrong with a recipe that incorporates apples, leeks, cider, wine, sage, and thyme to flavor the turkey and its accompanying gravy anyway?

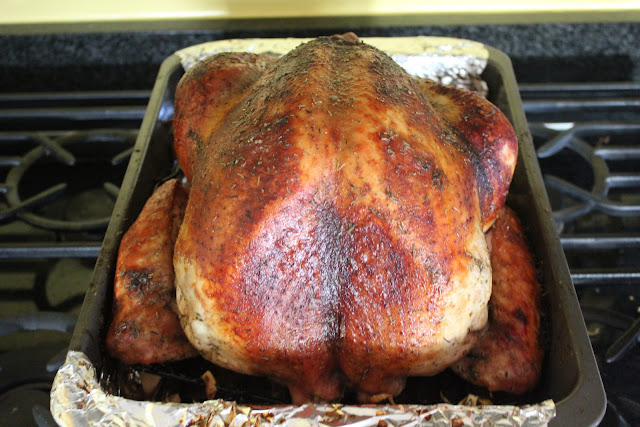
Jeff and I went to Stop & Shop last week and picked out a gorgeous 13.46-pound Butterball turkey, and then we went to Whole Foods this past Saturday morning to get all the accompaniments. On Sunday morning, I got up bright and early, prepped the turkey, and got it in the oven by 9 a.m. We had friends coming for dinner around 3, and I wanted to have the turkey cooked and carved and start making stock with the carcass before they arrived.


Every half-hour I would call Jeff over to the oven to help me baste the turkey. I would hold and turn the pan and make sure it didn't go sliding out of the oven while he basted it with a cider-wine mixture and some herbed butter. I think this diligent basting is what made the turkey come out so moist. I had toyed with the idea of brining it to ensure it would be moist, but brining wasn't even necessary.

In just 3 hours and 15 minutes, the probe thermometer I'd put in the turkey thigh was registering 165 -- actually it had gotten to 165 a while before, and I was starting to think it was stuck on 165, so I stuck the probe in the turkey breast, which registered 167. The recipe said the turkey thigh should be 180, but a quick phone call to Dad confirmed that I could, indeed, take my turkey out at its current temperature.

Cider-roasted turkey

I let the bird rest for 30 minutes, during which time I checked out a how-to-carve video on Butterball's website. I didn't like the way they sliced the breast, and I remembered seeing one of the test cooks at work do it differently, so I checked out YouTube, and sure enough, there was a how-to-carve video from America's Test Kitchen. I had Jeff watch the video with me, and then I gave him the oh-so-fun job of carving the turkey. He did an amazing job.

I reserved the thighs, turkey neck, and carcass for my stock -- that's right, do not throw away that turkey carcass (I have stock and soup recipes coming)! And then we plated the rest of the meat and tented it with foil to keep it moist.
In the meantime, I had poured the drippings in a bowl and placed them in the fridge so the fat would rise and solidify on top -- a trick from Dad that you can use if you don't have a fat separator. It speeds the process along a little. (I made sure to register for a fat separator... and a much nicer roasting pan.)

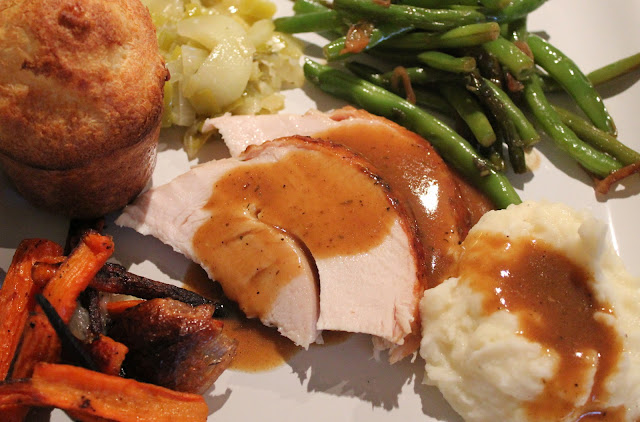
With the turkey carved and plated, I started my stock simmering, made my gravy and all of my sides (green beans with sage and brown butter, carrots roasted with thyme and shallots, and sautéed apples and leeks), and then when our friends arrived, I threw some popovers in the oven.


They brought mashed potatoes and dessert, and we had a mini Thanksgiving dinner that couldn't be beat!

Cider-roasted turkey

Golden Cider-Roasted Turkey (adapted from Sunday Roasts)
Print this recipe

Ingredients

1 (13- to 14-pound) turkey, patted dry
Kosher salt and pepper
2 cups (160 grams) chopped leeks, white and light green parts only (1 to 3 leeks)
2 small Granny Smith apples, peeled, cored, and diced
4 sage sprigs, plus extra for garnish
4 thyme sprigs, plus extra for garnish
12 tablespoons unsalted butter, softened
1 tablespoon dried sage
1 tablespoon dried thyme
2 1/2 cups apple cider
1 1/4 cups dry white wine
2 to 3 tablespoons flour

Preparation

Arrange a rack at center position, and preheat oven to 325 degrees. (Make sure you can fit your turkey in the oven. I removed the top rack to make room.)

Remove the turkey neck and giblets from the cavities in the turkey. Discard the giblets and save the neck to roast with turkey.


Place the turkey on a rack set in a roasting pan, and place the neck in the pan next to it. Season the cavity of the turkey with salt and pepper.

Combine apples and leeks in a bowl, and place 1 cup (100 grams) of the mixture in the turkey cavity along with the sage and thyme sprigs.


If you use a Butterball turkey, you need only fold the wings under the turkey, but if you get a different turkey, you'll need to truss your turkey at this point (tie the legs together and secure the wings with twine).

In a medium bowl, mix together the butter, dried sage, dried thyme, 1 1/2 teaspoons salt, and 1 teaspoon pepper until well blended. Reserve and set aside 2 tablespoons of the herb butter for the gravy.

Take 4 tablespoons of the remaining herb butter and rub it all over the turkey.


Spread the remaining leeks and apples on the bottom of the pan.

Combine the cider and white wine in a bowl or large measuring cup. Reserve 1 1/2 cups of the cider mixture for the gravy.

Pour 1/3 cup of the remaining cider mixture over the turkey.


Roast the turkey until golden brown and thermometer inserted in thigh registers 180 degrees (or use your judgment), basting every 30 minutes with the cider mixture and 1 tablespoon of the herb butter, for about 3 hours and 10 minutes or longer.


If turkey starts to brown too much, cover it loosely with foil.

When the turkey is done, transfer it to a platter and let it rest for at least 30 minutes. (I used two dish towels to pick up the hot turkey and move it to a platter.)

Cider-roasted turkey

Cider-roasted turkey

Cider-roasted turkey

Set a sieve over a large bowl, and pour the pan drippings through it. Press down on solids to squeeze juices out, and then discard solids. Skim off fat drippings. (As I mentioned above, you can put the drippings in the fridge for a while and the fat will solidify, so you can just scoop it right off the top. And save that fat for sautéing the veggies for turkey soup!)


Pour the drippings and any juices from the platter into a saucepan, add the reserved cider mixture and any cider mixture left over from basting. Place the pan over medium-high heat, and cook, stirring often, until liquids are reduced by a third, about 5 minutes.

Combine reserved herb butter, any remaining herb butter form basting, and 2 tablespoons of flour to make a paste. (Add more flour, if you want a thicker gravy.)

Stir the butter-flour mixture into the pan a little at a time until the sauce thickens and coats the back of a spoon, 5 to 6 minutes.

Season with salt to taste, and transfer to serving bowl or gravy boat.

Carve and plate the turkey (reserve neck, thighs, and carcass for stock, if desired), garnish with sage and thyme sprigs, and serve, passing gravy on the side.


Cider-roasted turkey

Some notes: The original recipe calls for 3 to 4 leeks, and I only needed 1 to get 160 grams of chopped leeks, so I made sautéed apples and leeks with the extras. I took my turkey out long before the thigh registered 180 degrees. The breast was at 165. I was a little worried that the thighs weren't fully done, but I just reserved them for my stock instead of serving them, so I didn't have to take any chances. And they filled my soup with tons of flavorful turkey meat. (Stock and soup recipes to come.)

This turkey was so moist! I was really happy with the way the recipe came out. The gravy was a tad on the sweet side, but it was so flavorful and complemented the turkey nicely.

Cider-roasted turkey

We're heading to Jeff's parents' for Thanksgiving dinner. I'll be making a dessert that I'll share with you soon.

What are your Thanksgiving plans?


I'm not planning to blog about any of my sides, but here are the sources for the recipes:

Green Beans with Browned Butter, Hazelnuts, and Sage (I left out the hazelnuts) - Cook's Country, November 2011
Roasted Carrots with Shallots and Thyme - Light & Healthy 2012: The Year's Best Recipes Lightened Up
Sautéed Apples and Leeks (modified to leave out the chicken) - Eating Well
Popovers - Baking Illustrated