

Thomas Keller specifically writes in the introduction to Ad Hoc at Home that one should not attempt more than one new thing in the kitchen at a time. That is precisely what I do all the time. And making this cake was no exception.
I knew the techniques, for the most part, and I knew how to manage my time and plan out what to make when, but I hadn't made any of these recipes before.
I picked up James Peterson's Baking with the intention of making something from it for the first time since I got it, months and months ago. I had flipped through it numerous times before but had always thought it too complicated. I reasoned with myself. I told myself that I could find a simple cake in there that I could execute. I reminded myself that I knew how to follow a recipe word for word, step by step, and that was all I needed to know.
I was making a cake for Jeff's mother's birthday dinner, which we celebrated about a month ago now. Jeff's sister had requested that I make a chocolate cake, and I wasn't finding any I really wanted to make until I saw this devil's food cake in Baking. When I laid eyes on it, I knew it was the right cake.
Thin layers of chocolate cake brushed with coffee syrup, filled with whipped ganache, and frosted with chocolate buttercream would make for the perfect birthday cake.
In preparation for making this cake, I learned that American cakes typically have two or three thick layers of cake and French cakes have several thinner layers of cake. I am definitely a fan of the latter. This cake with its four relatively thin layers falls somewhere in between.
I went through quite a bit of trial and error with this cake, and I've decided to save you the hassle and just provide you with the recipes that worked. The chocolate buttercream frosting did not work for me. It is an Italian meringue buttercream, and for some reason, it never set up. I have heard that humidity can be a huge factor when making this particular type of buttercream, so I'll blame the humidity. (One of these days I'll go back and give it another try and figure out what went wrong.)
Remember to read through all of the recipes before starting to make sure you have everything you need.

Devil's Food Cake With Ganache And Chocolate Curls (adapted from James Peterson's Baking)
(Print this recipe)
Devil's Food Cake
Ingredients
1 cup cake flour
1 1/2 teaspoons baking soda
1 teaspoon baking powder
1/4 teaspoon salt
1/2 cup butter, sliced, at room temp
6 ounce bittersweet chocolate, chopped
1 cup sour cream
3/4 cup sugar
3 eggs
Preparation

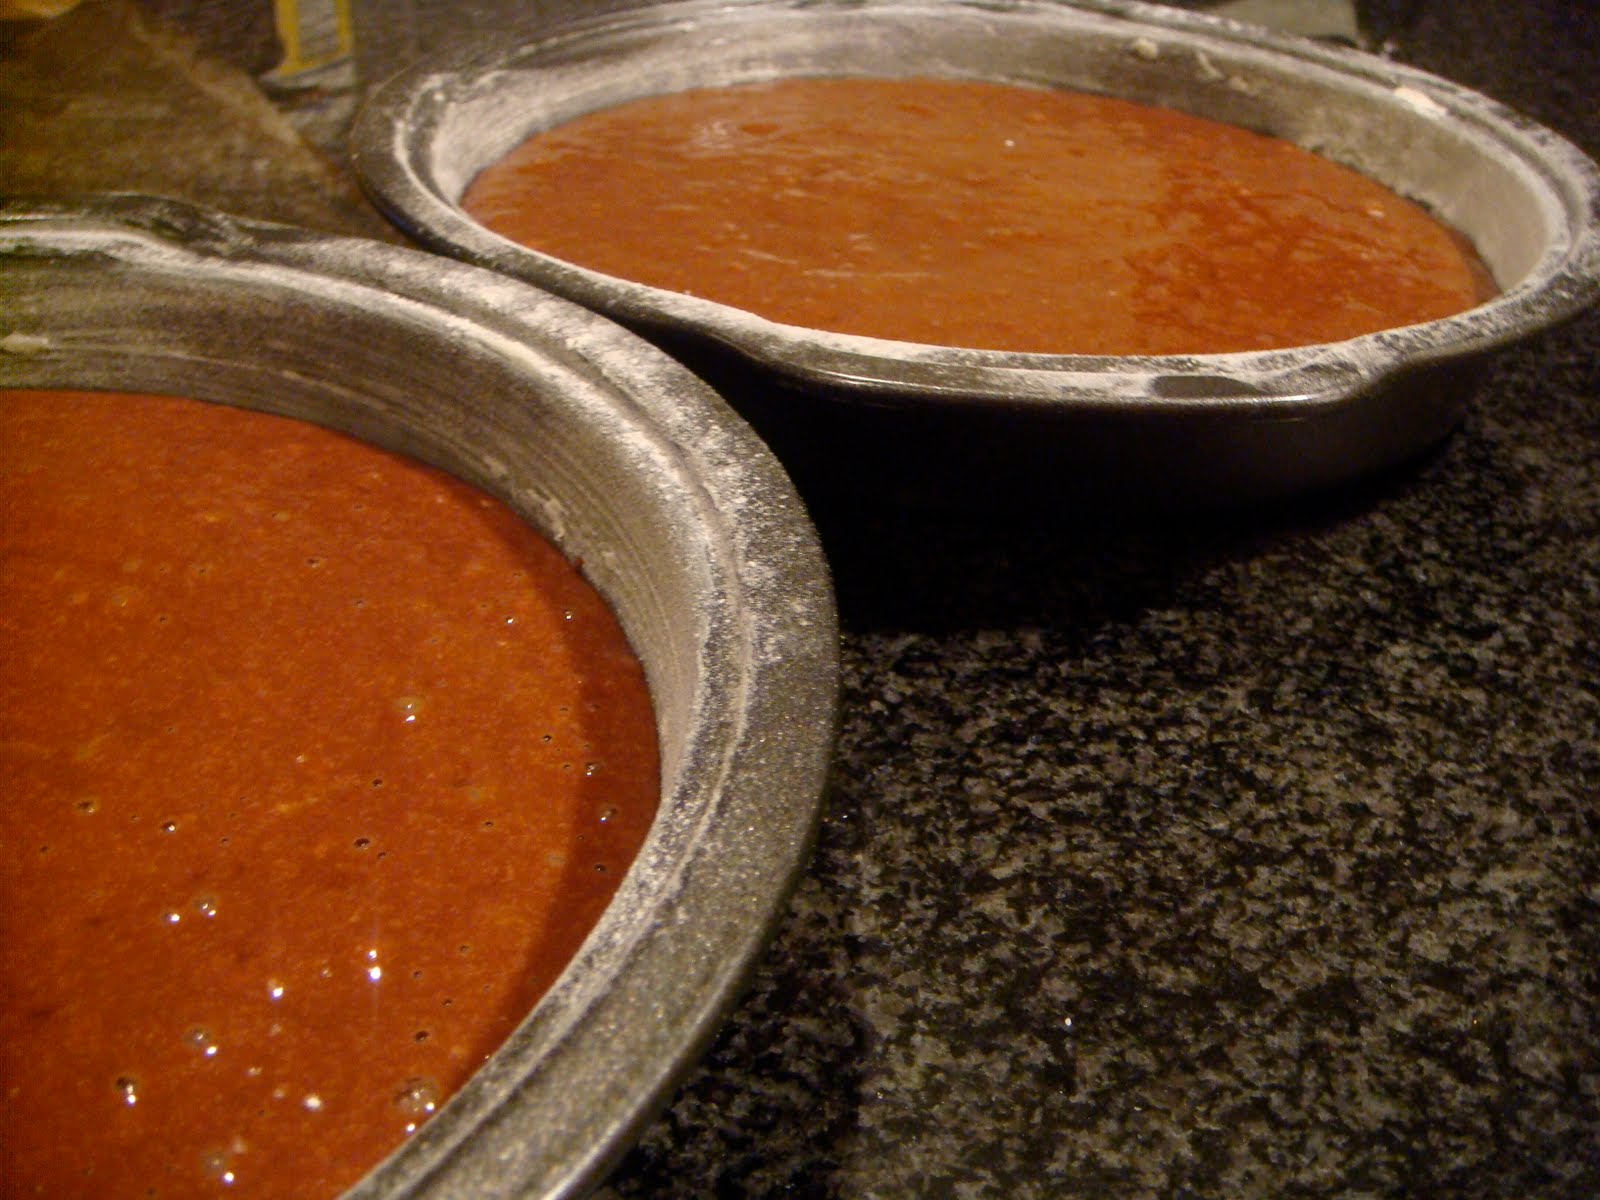
Preheat oven to 350 degrees. Butter and flour two 9-inch round cake pans.

Combine flour, baking soda, baking powder, and salt in a small bowl.
Set up a double boiler (water should be simmering), and place butter, chocolate, and sour cream in top pot (or bowl). Stir until smooth, and remove from heat as soon as chocolate has melted.

In a large bowl, whisk together sugar and eggs until smooth. Whisk the chocolate mixture into the egg mixture. The sift the dry ingredients over the chocolate-egg mixture, and fold in with a rubber spatula.
Divide the batter between the prepared pans, and bake for about 25 minutes or until toothpick inserted in center comes out clean.
Let the cakes cool in pans on wire racks for 5 minutes, and then flip them out and cool them completely.
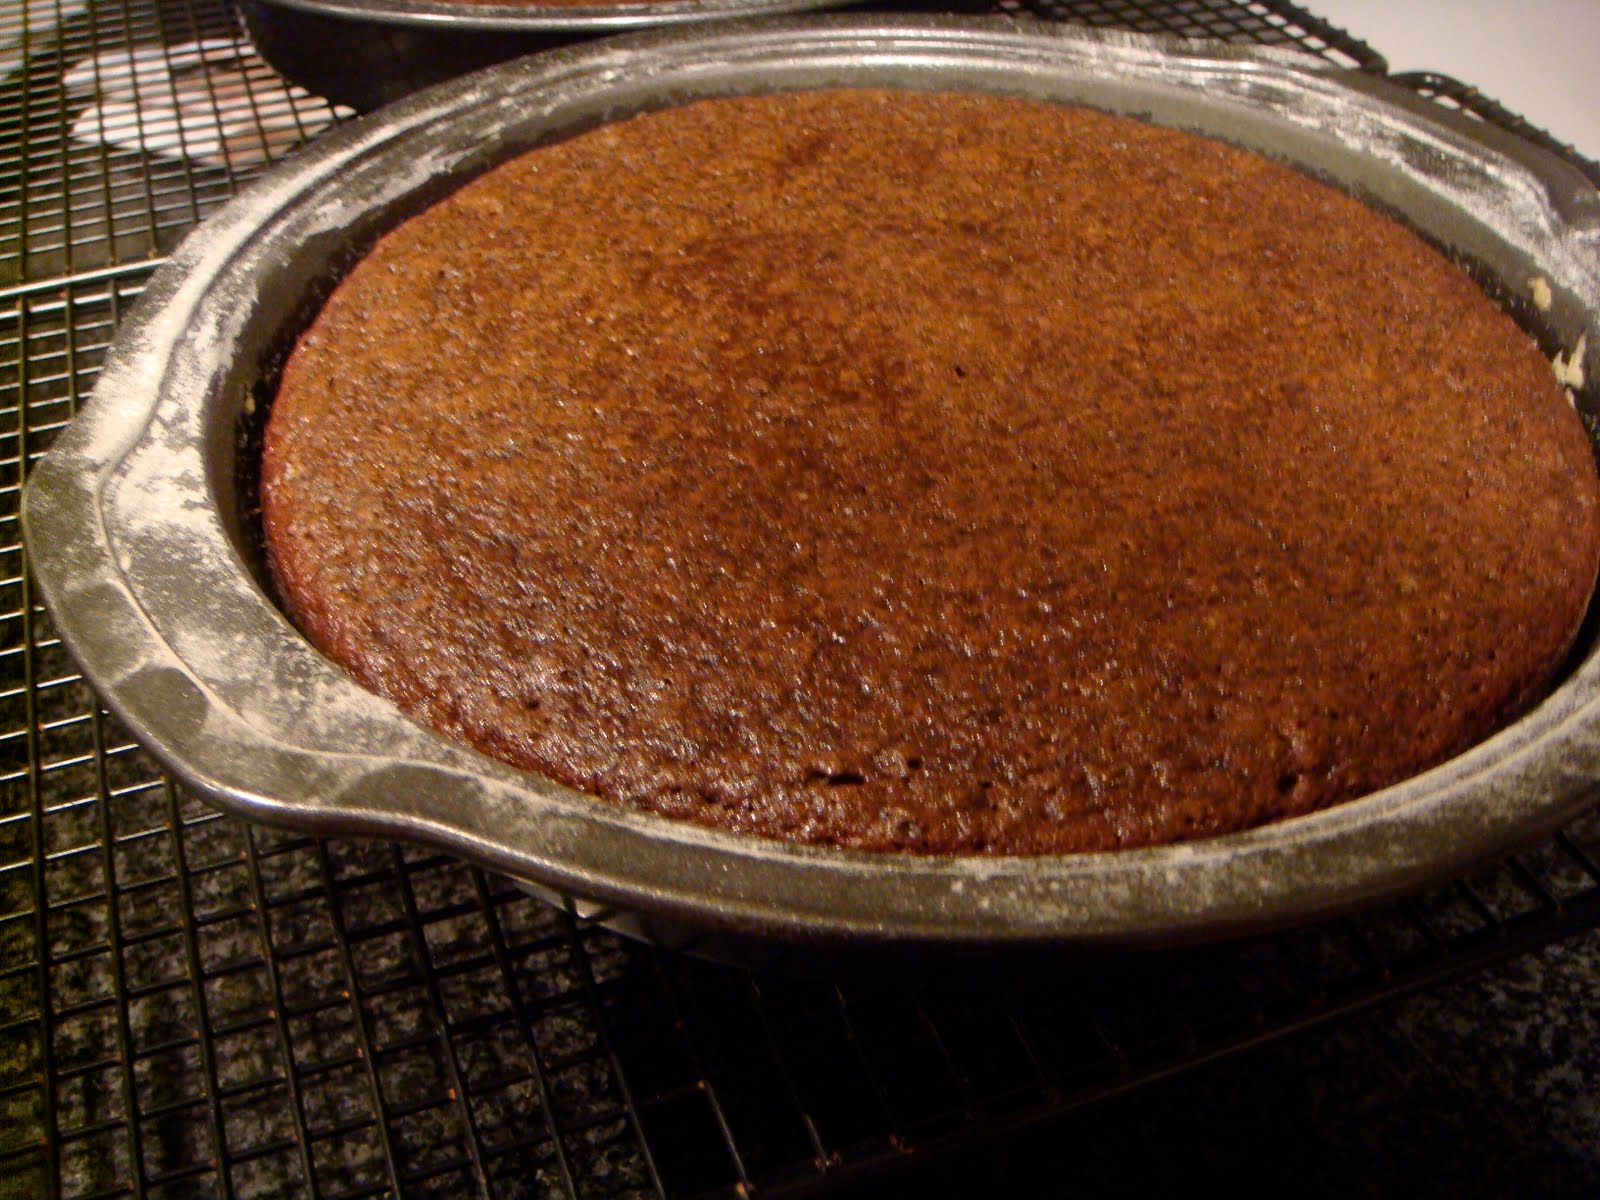
I did this the night before, wrapped the cakes tightly, and waited to frost and finish them the next day. I also chopped chocolate for the following recipes and made the coffee syrup below just to cut down how much time I would need to spend finishing the cake the next day.
Coffee Syrup
Bring 3/4 cup sugar and 3/4 cup water to a boil. Remove from heat, and stir in 3 tablespoons of brewed coffee.
Whipped Ganache
Place 16 ounces of bittersweet chocolate, chopped, in a medium heatproof bowl. Bring 1 cup heavy cream to a boil, and pour it over the chocolate.

Whisk until the chocolate is smooth. Add 1 cup cold heavy cream, and quickly whisk it into the chocolate mixture.

Let cool slightly, and then pour ganache into bowl of stand mixer fitted with whisk attachment. Whip ganache until it is light and fluffy.
Assemble The Cake
Cut each of the layer cakes in half crosswise using a cake knife or wire cake cutter. Jeff cut the cakes into layers using a new wire cake cutter we had picked up at Michael's. He has much steadier hands and is better with straight lines than I am. (I really, really want a Wusthof cake knife, but I don't think they make them anymore.)

The cakes are very thin, so be careful. If you do break a layer, just use it as a middle layer of the cake and piece it together as well as you can. Just save the best layer for the top (a bottom layer, flipped over, works best).

Take an 8- or 9-inch cake board round, and smear a little of the whipped ganache in the middle of it. Place the first layer on the cake board. Brush with the coffee syrup. Spread with about 1/4 of the whipped ganache.
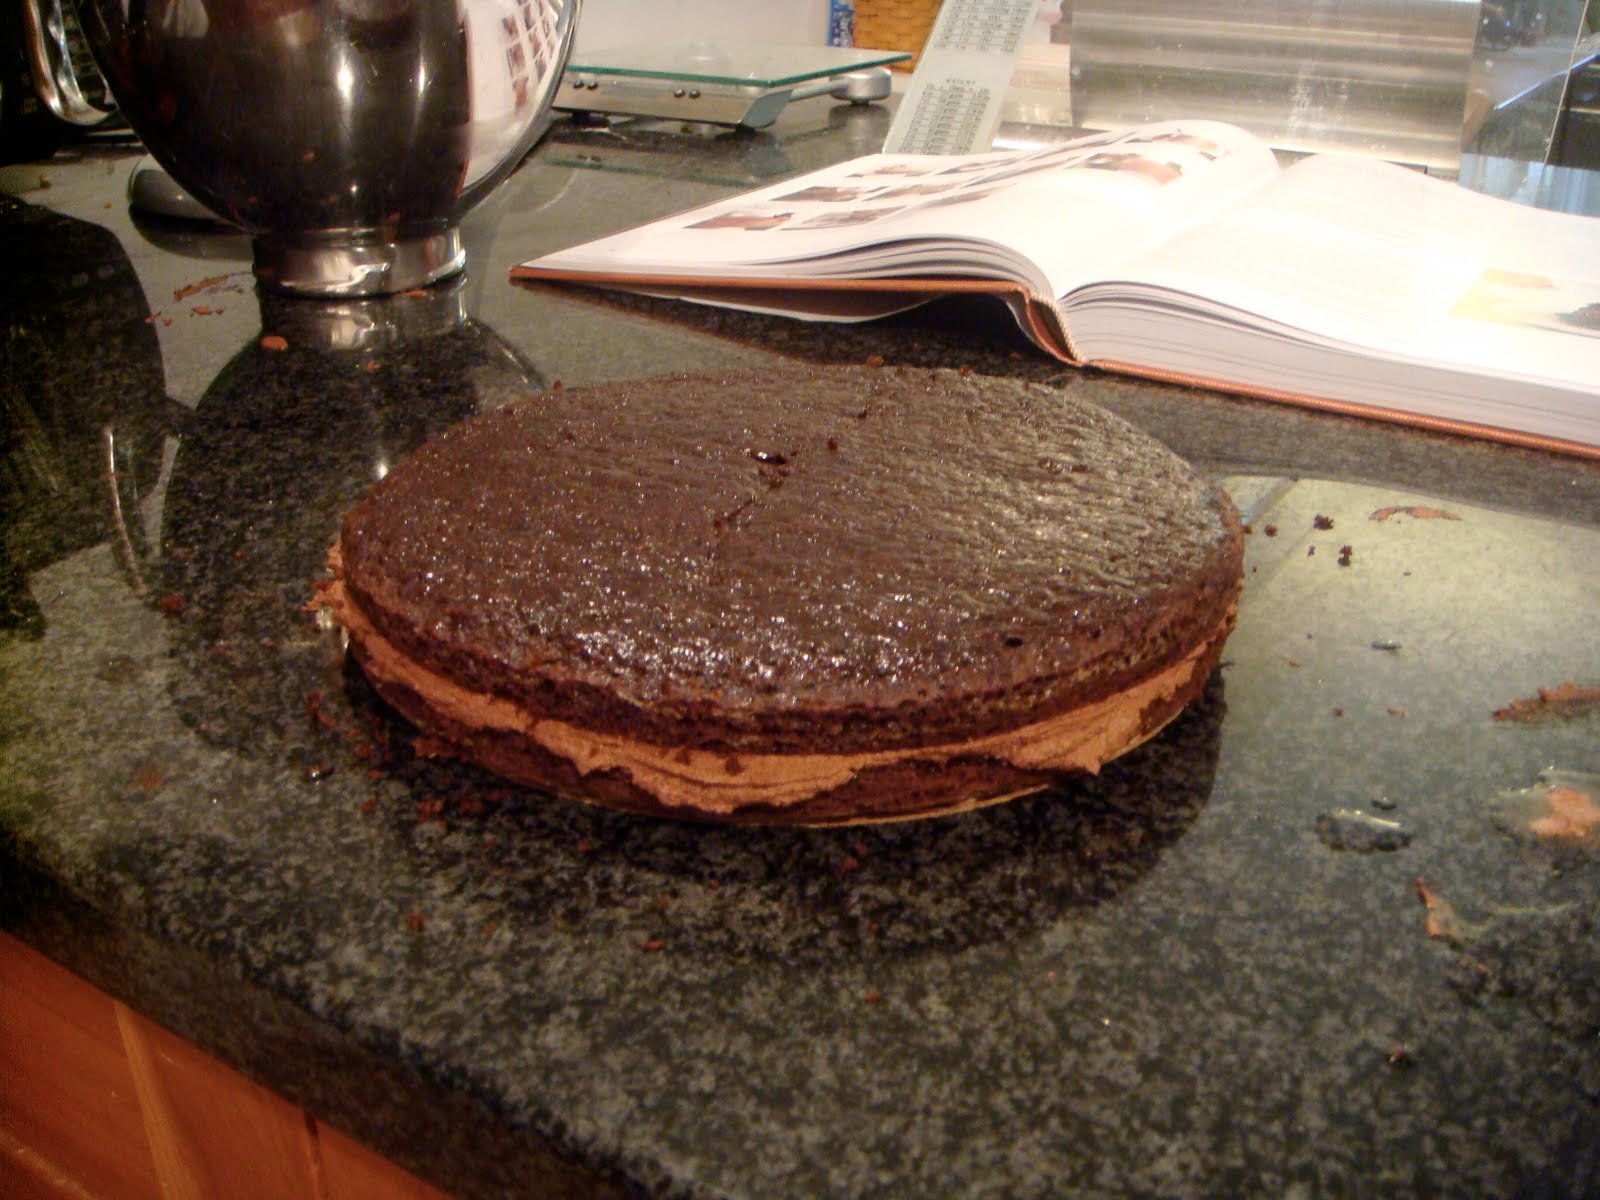
Place the next cake layer on top, brush it with coffee syrup, and spread another 1/4 of the whipped ganache over the layer. Do the same with the next layer. (You will have extra coffee syrup.)
Place the final layer on top, and use the remaining whipped ganache for a crumb coat. Basically just spread it evenly over and around the cake, making sure to smooth it, and don't worry too much about coating every little bit of cake. If you have a cake stand, it's easiest to work with the cake on a stand.

Pull your offset around the cake, and then working from the outside in toward the middle, pull the offset over the top of the cake. Keep moving the offset over a little and pulling the next pile of ganache from the edge toward the center. Go around the whole cake like this until it is smooth.

Place the cake in the fridge to firm up.
At this point, I attempted to make the Italian meringue buttercream, but it was a futile attempt, so I fell back on something I learned at Flour: I coated the cake with ganache. I apologize for the lack of pictures. I may seem cool, calm, and collected, but I was a little stressed after the buttercream failed, so I pushed through these next steps.
Ganache
Place 8 ounces of bittersweet chocolate, chopped, in a medium heatproof bowl. Bring 1/2 cup hevay cream to a boil, and pour it over the chocolate. Whisk until the chocolate is smooth. Add 1/2 cup cold cream, and quickly whisk it into the chocolate mixture. Check the consistency of the ganache. If it is pourable, you can use it right away. If it seems a little thick, microwave it in 30-second increments until it is pourable. If it's too runny, place it in the fridge to cool and thicken.
When your ganache is ready, remove the cake from the fridge and place it on a wire rack set in a baking pan. Have an offset ready. Pour the ganache over the cake, going around the outside first and then pouring the rest in the middle. Use your offset to quickly swipe the ganache across the top of the cake just once. Check to see which side of the cake might not be covered well, and pull the extra ganache in that direction, letting it stream down the sides of the cake. (If your cake isn't covered well, you can make more ganache and re-coat it.)
Set out a 10-inch cake board. Slide your offset under the cake, and lift it until you can get your hand under it. Using your hand and the offset, transfer the cake to the 10-inch cake board. Try to set it in the middle of the board and wiggle it around with the offset to center it.
Place the cake in the fridge, and place the baking sheet with the run-off ganache in the fridge if you want to pipe a border around your cake.
Piping The Border
Scoop the chilled ganache off the baking sheet and into a piping bag fitted with a star tip. Pipe a border around the cake by pressing and then pulling through and repeating all the way around the cake. It takes a while to get the hang of this, so I recommend practicing. You can always make extra ganache if you have more cream and chocolate on hand.

I wanted to write on the cake and make a border like I learned to do at Flour, but I forgot to buy white chocolate bars, and white chocolate chips do not melt well or work out for piping (don't even try to use them). I had to improvise, and when I found a block of semisweet chocolate among my chocolate supply, I decided to make some chocolate curls. At Flour, I would use a paring knife to do this, but not having the proper knife at home, I used a vegetable peeler instead. If the chocolate is too cold, it will just break, so you do have to test it and microwave it in 15-second increments until it is the right temperature. I made tons and tons of curls (and shards) and covered the top of the cake with them. You could decorate with fruit or write on the cake instead. It's up to you.

Presenting The Cake
I brought the cake to Jeff's mother's birthday dinner at Olivadi in Norwood, Mass. (they have an amazing eggplant appetizer), and the restaurant let us hide the cake in the kitchen until it was time for dessert. When our waitress presented the cake, everyone oohed and aahed and we sang "Happy Birthday." Then she took the cake back to the kitchen to cut and plate it for us.

While this was happening, another waitress ran out to tell me how gorgeous the cake was and how everyone in the kitchen was in disbelief that someone had actually made that cake at home and brought it in. There was plenty of cake to go around, so we shared with the kitchen, and they wanted to hire me on the spot. If only I could handle those restaurant hours. I did briefly consider the idea of making cakes and dropping them off, but the restaurant is pretty far from where we live, and I'm not sure I'm ready for that kind of commitment yet. An occasional cake here and there? Sure.
If that's not praise enough, the birthday girl and the rest of Jeff's family loved the cake too. I was pleased that it stayed moist, that it looked stunning, and that it had such incredible, deep chocolate flavor, even though I hadn't made it the way I originally intended.
We had about a quarter of the cake left, and Jeff brought it to a softball BBQ the next afternoon. Everyone enjoyed it there too, and I was happy to hear that it was still moist even a day later. That's always a plus. A lot of time and effort went into making that cake, so the more miles it can cover, the better.

For another show-stopping chocolate cake, check out my triple chocolate mousse cake.